A comprehensive roof and wall purlins guide for steel structure buildings is essential for ensuring long-term load distribution, structural integrity, and structural alignment. Designing or procuring secondary framing without precise engineering specification frequently leads to misaligned wall panels, sagging roofs, and severe structural deformation. A single minor miscalculation in spacing or steel gauge doesn’t just delay construction; it triggers code-compliance failures, expensive on-site retrofits, and potential collapse under extreme environmental loads. Specifying high-grade roof and wall purlins resolves these risks by providing a robust, cost-effective framework that bridges the gap between your main steel portals and exterior cladding.
Why are roof and wall purlins essential?
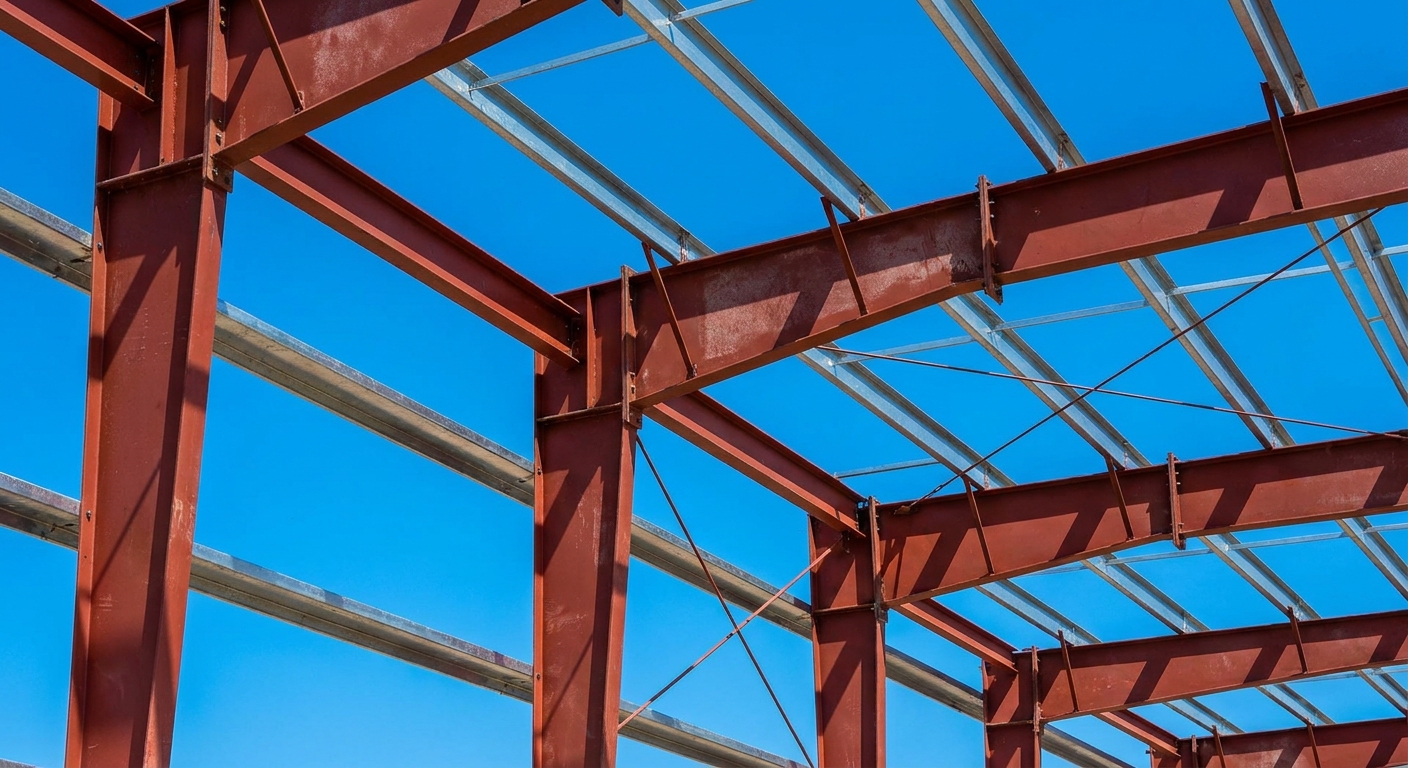
Roof and wall purlins are essential because they form the critical secondary framing skeleton that supports and transfers loads to the main structural frame. Secondary framing members like roof and wall purlins act as continuous lateral ties across the building’s main portals. They prevent lateral torsional buckling of primary rafters and columns by anchoring them at designed intervals. Without these members, the building’s primary steel structure would lack the necessary lateral restraint.
Additionally, these sections provide a flat, aligned plane for the direct attachment of metal wall and roof panels. They distribute localized external forces, such as wind pressure and snow accumulation, evenly across the primary frames. This load-sharing mechanism prevents structural overload at individual points.
What is the core structural role of girts?
Think about it: wall girts are actually just horizontally oriented purlins designed to resist wind loads acting against the B2B building’s envelope. They transfer suction and pressure forces directly to the primary vertical columns to maintain wall rigidity. If you omit or under-specify these components, your exterior cladding will deflect excessively under wind forces.
To achieve maximum performance, you must align these members with precise horizontal spacing. Here are the core functions they perform:
- Resisting lateral wind loads on the building envelope.
- Supporting the dead weight of wall cladding and insulation.
- Providing a continuous surface for fast sheet installation.
How do they transfer wind and gravity loads?
Secondary framing acts as a load-distribution bridge. When wind hits the roof or gravity loads accumulate snow on top, the metal panels bend and push against the purlin. The purlin then transfers this combined bending moment to the rafters as point loads.
This sequential load path protects the structural integrity of the entire steel building. You can optimize the overall steel weight by utilizing continuous multi-span systems rather than simple spans.
Key Takeaway: Correctly specifying secondary framing stabilizes primary frames and guarantees the outer cladding remains secure.
| Purlin Role | Primary Load Types | Structural Restraint | Target Efficiency | |
|---|---|---|---|---|
| Roof Purlins | Gravity, snow, wind uplift | Lateral restraint for rafters | High load-to-weight ratio | |
| Wall Girts | Horizontal wind pressure/suction | Lateral restraint for columns | High deflection resistance |
Let us now examine the specific cross-sections and profiles available to determine which fits your structural layout.
Which roof and wall purlins fit your build?
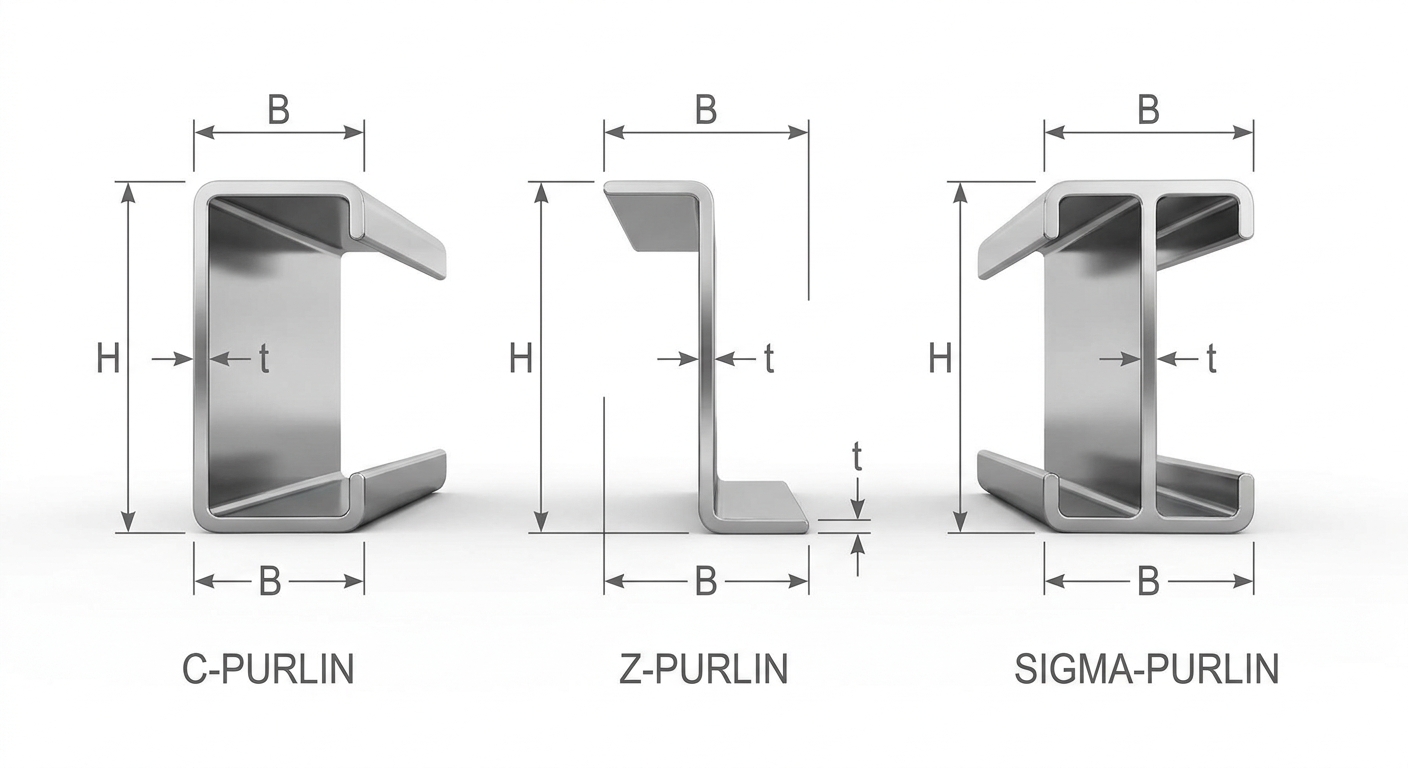
The ideal roof and wall purlins for your build depend on the specific structural spans, connection layouts, and nesting requirements of the project. Selecting the correct profile of roof and wall purlins ensures optimal strength-to-weight efficiency and simple installation. Standard configurations include C-shaped, Z-shaped, and Sigma-shaped cold-formed steel profiles. Each design serves distinct structural purposes across different types of industrial framing.
Choosing a profile is dictated by whether your framework relies on simple single-spans or continuous multi-span runs. Designers must evaluate the manufacturing tolerances, flange widths, and nesting properties before finalizing the layout.
C-purlins vs. Z-purlins explained
Let’s break it down: C-purlins feature equal flanges and are best suited for simple, single-span applications. They cannot be nested, meaning they are typically bolted end-to-end at the support frames. This makes them ideal for wall girts, door frames, or roof perimeters where flat mounting faces are required.
On the flip side, Z-purlins have one flange slightly wider than the other, allowing them to nest together. This overlapping capability creates a continuous beam effect over support columns, doubling the load capacity at critical points.
- C-Profile Benefits: Flat web mounting, simple end-clipping, excellent for wall openings.
- Z-Profile Benefits: Continuous nesting, reduced deflection, ideal for high-load roofs.
Choosing the right shape for your spans
But that is only half the story. Sigma profiles offer an even higher strength-to-weight ratio for extra-long spans under heavy loading. When you design low-pitch roofs or massive industrial sheds, matching the profile to the span length is crucial for keeping material costs low.
By selecting Z-profiles for continuous spans and C-profiles for simple boundaries, you achieve structural balance.
Key Takeaway: Utilizing Z-profiles over multiple bays allows for thinner gauges while maintaining high load capacities.
| Purlin Profile | Ideal Application | Structural Advantage | Typical Span Capacity | Preferred Connection | |
|---|---|---|---|---|---|
| C-Purlin | Wall girts, door frames, roof edges, simple spans. | Flat-face mounting; easy trimming and header framing. | 4.0m to 6.5m | Bolt-to-cleat plate connection | |
| Z-Purlin | Large-span roofs, continuous multi-span frames. | Overlapping capability (nesting) increases load-bearing capacity. | 6.0m to 9.5m | Overlapped bolted connection | |
| Sigma Purlin | Extra-high load demands, low-pitch roofs. | Higher strength-to-weight ratio than C or Z shapes. | 8.0m to 12.0m | High-tensile bolted joint |
After selecting the profile, you must determine the appropriate thickness and gauge to handle design stress limits.
Secure your steel building with high-quality roof & wall purlins!
Email:sales@showhoo.com.cn
Phone/WhatsApp: + 86 186 7895 5927
How to size roof and wall purlins right?
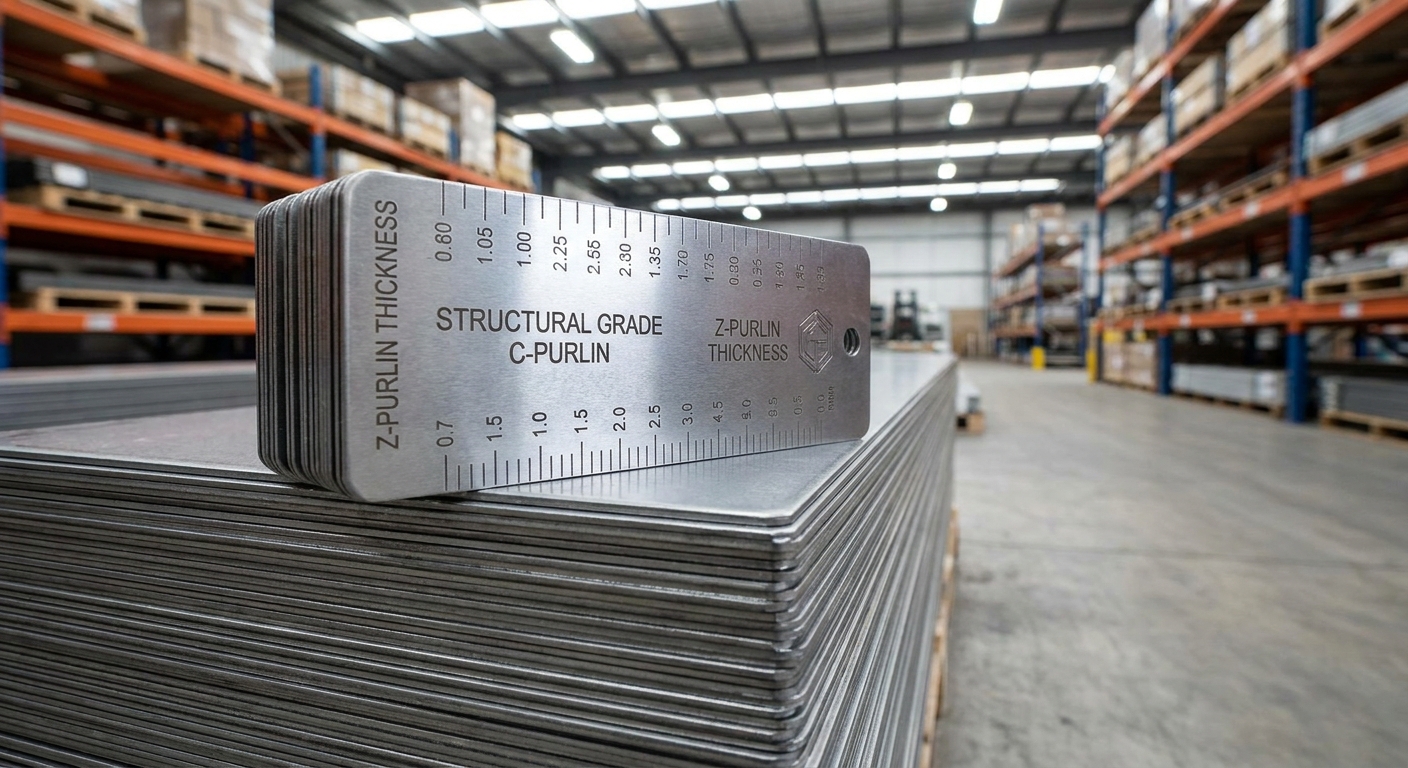
Sizing roof and wall purlins right requires calculating the specific gauge thickness, depth, and flange width relative to the structural span and regional design loads. To properly size roof and wall purlins , engineers must evaluate dead loads, live loads, and wind uplift pressures. Cold-formed steel sections are thin-gauge members, meaning small deviations in thickness drastically alter their load-bearing capacity. Choosing the wrong gauge can lead to excessive structural deflection or complete bending failures.
Standard B2B procurement typically involves thicknesses ranging from 1.5mm to 3.0mm, corresponding to common steel gauges. Calculating the required depth, which typically ranges from 100mm to 300mm, is essential to meet structural code requirements.
Understanding steel thickness gauges
The best part? Standardizing your gauge choices saves both fabrication time and material costs. You should know that 14-gauge (approx. 1.9mm) and 12-gauge (approx. 2.7mm) are the industry workhorses for commercial developments. Opting for high-tensile steel grades like Q355 or equivalent allows you to reduce physical thickness without sacrificing overall strength.
Sizing decisions must factor in the following thickness parameters:
- 16-Gauge (1.5mm): Suitable for light-duty wall girts and short roof spans.
- 14-Gauge (1.9mm): The standard choice for medium-span commercial roof framing.
- 12-Gauge (2.7mm): Ideal for heavy-duty industrial warehouses with large spans.
Can you calculate load-bearing limits?
You must ensure that under full load, the maximum deflection does not exceed L/150 (span length divided by 150) for typical cladding. If you ignore local building codes regarding snow and wind uplift, your panels may warp, allowing moisture to breach the building envelope.
Using local wind speed maps and snow coefficient tables helps you establish accurate dead and live load parameters.
Key Takeaway: Matching structural thickness to calculated load limits prevents catastrophic buckling while keeping frame weights light.
| Thickness Gauge | Millimeter Equivalent | Recommended Max Span | Load Suitability | |
|---|---|---|---|---|
| 16-Gauge | 1.5 mm | Up to 5.0 meters | Light wind zones, wall girts | |
| 14-Gauge | 1.9 mm | Up to 7.0 meters | Standard roof loads | |
| 12-Gauge | 2.7 mm | Up to 9.0 meters | Heavy snow/wind zones, wide bays |
Having sized your members, let us address the critical rules governing the spacing of these framing components.
What spacing works for roof and wall purlins?
The spacing that works for roof and wall purlins typically ranges from 1.2 meters to 1.8 meters, depending on regional wind uplift, snow loads, and cladding type. Determining the physical spacing of roof and wall purlins directly affects both construction costs and structural safety. If your spacing is too wide, the roof panels will deflect, creating low spots where water pools. Conversely, placing them too close together adds unnecessary weight and inflates your B2B procurement budget.
Spacing must always be calculated dynamically based on local engineering codes rather than utilizing a one-size-fits-all approach. Large-span structures in severe weather zones require tighter spacing patterns to resist dynamic pressure spikes.
Standard spacing guidelines for safety
Here is the deal: standard spacing for industrial projects usually settles around 1.5 meters on center. This spacing perfectly matches the structural capabilities of standard 24-gauge or 26-gauge steel cladding sheets. By aligning your girt and purlin runs with these spans, you reduce waste and installation labor.
Always ensure your spacing design accounts for these essential factors:
- Cladding material thickness and profile depth.
- Typical live load assumptions for roof maintenance workers.
- Standard panel lap locations to avoid cantilevered sheet ends.
How do you adjust for extreme wind zones?
High wind loads create localized low-pressure vortices along the roof edges and building corners. To prevent the cladding from ripping off, you must decrease purlin spacing near these high-risk perimeter zones. Reducing the spacing by 20% to 30% in these critical zones distributes the intense uplift force safely.
This zoned design strategy provides maximum structural protection without requiring heavy profiles across the entire building.
Key Takeaway: Narrowing spacing at roof perimeters and building corners prevents wind uplift failures during severe storm events.
| Building Area | Normal Wind Zone Spacing | High Wind/Snow Zone Spacing | Cladding Consideration | |
|---|---|---|---|---|
| Interior Roof Bays | 1.50 m to 1.80 m | 1.20 m to 1.40 m | Standard trapezoidal sheeting | |
| Eaves and Ridges | 1.20 m to 1.40 m | 0.90 m to 1.10 m | Heavy wind uplift resistance | |
| Wall Girts | 1.50 m to 1.80 m | 1.20 m to 1.50 m | Insulated sandwich panels |
Once your spacing layout is finalized, you must coordinate the actual installation and erection workflow.
Secure your steel building with high-quality roof & wall purlins!
Email:sales@showhoo.com.cn
Phone/WhatsApp: + 86 186 7895 5927
How to install roof and wall purlins fast?
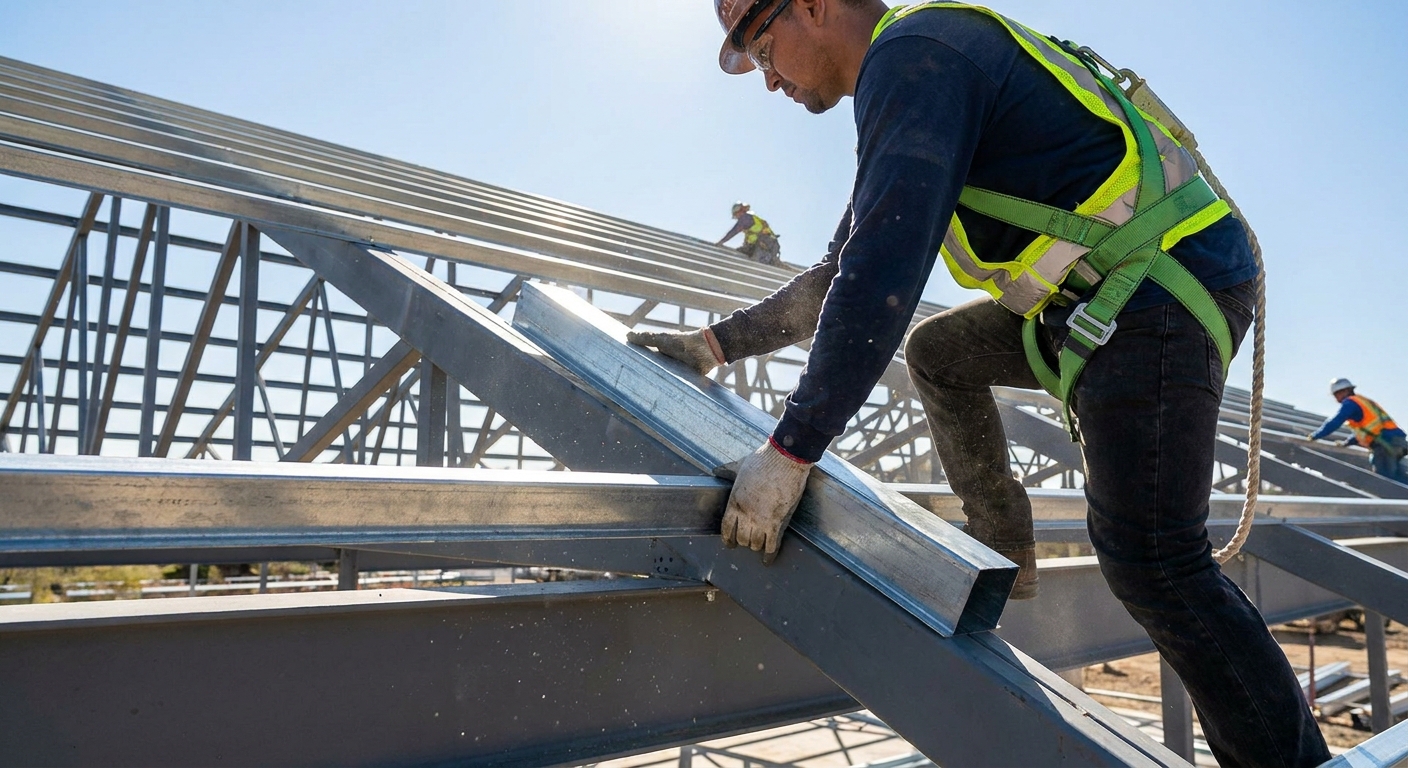
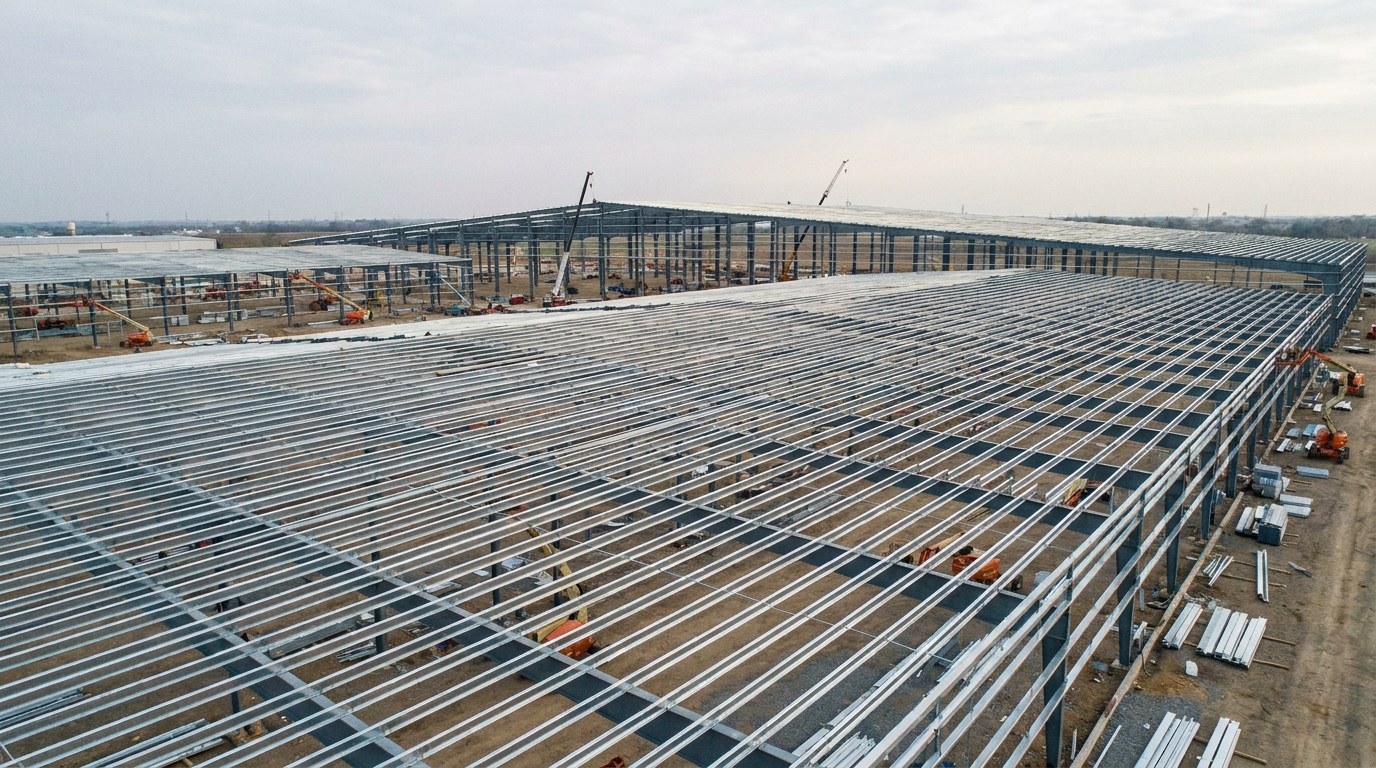
Installing roof and wall purlins fast requires pre-punching bolt holes during fabrication, checking frame alignment, and coordinating sequential crane hoisting. An efficient erection sequence for roof and wall purlins minimizes crane rental costs and shortens your total construction schedule. Contractors should always demand pre-punched holes from the factory to eliminate slow, manual field drilling. Field drilling not only damages protective zinc coatings but also introduces human alignment errors during assembly.
Before hoisting begins, the primary steel frames must be plumbed, leveled, and temporarily braced to prevent shifts. Any structural misalignment in the main columns will cascade through the secondary framing, making sheet attachment extremely difficult.
Pre-installation alignment checks you need
Trying to force a pre-punched steel purlin onto an unaligned rafter cleat is a recipe for frustration. You must verify the center-to-center rafter dimensions and check for diagonal squareness across the structural bays. Adjusting the primary frame alignment before lifting your secondary steel ensures that everything lines up perfectly.
Before beginning the actual lift, make sure you complete these verification steps:
- Verify the vertical plumb of all main column frames.
- Confirm cleat plates are straight and free of weld spatter.
- Pre-sort C and Z profiles on-site by gauge and length.
Step-by-step hoisting sequences to follow
But that is only half the story. By pre-assembling groups of three or four purlins with sag rods on the ground, you drastically reduce risky high-altitude work. The crane can lift the pre-assembled frame as a single rigid unit, which is safer and faster.
Once the assembly is lifted, ironworkers secure the structural bolts quickly to anchor the bay.
Key Takeaway: Ground pre-assembly of secondary framing grids reduces crane time and improves on-site safety records.
| Step | Action Item | Quality Objective | Time-Saving Trick | |
|---|---|---|---|---|
| 1. Ground Sorting | Sort by length, profile, and gauge | Eliminate assembly confusion | Color-code members at factory | |
| 2. Alignment Check | Plumb and level primary rafters | Prevent framing misalignment | Use laser transit levels | |
| 3. Bay Hoisting | Lift pre-assembled secondary grids | Reduce high-risk overhead labor | Assemble grids on ground templates |
With the framing positioned, you must select the most reliable method for securing these connections.
How to secure roof and wall purlins safely?

Securing roof and wall purlins safely is achieved by using high-tensile structural bolts through factory-cleats and installing structural sag rods to prevent twisting. Choosing the proper connection method for roof and wall purlins is crucial for maintaining long-term structural integrity under wind load reversals. Welded connections might seem convenient, but welding thin cold-formed steel is highly discouraged due to burn-through risks. Furthermore, welding strips away protective coatings, leaving the connection point highly vulnerable to corrosion.
In contrast, bolted connections distribute forces evenly and allow the structure to accommodate thermal expansion and contraction. Utilizing standardized structural bolts ensures a consistent, high-tensile joint that meets B2B quality standards.
Bolting vs. welding connections compared
Here is the kicker: high-tensile bolted connections are much faster to inspect than field welds. You can easily verify bolt torque with a calibrated wrench, whereas testing field welds requires specialized testing. Additionally, bolting eliminates the need on-site for certified welding rigs and fire-watch personnel, which lowers your insurance risks.
When designing your bolted connections, keep these structural specifications in mind:
- Use high-strength carbon steel structural bolts (e.g., Grade 8.8).
- Ensure washers are installed on both sides of thin-gauge steel sheet joints.
- Never over-torque bolts, as this can crush the thin-gauge cold-formed lips.
Utilizing sag rods for lateral stability
Because cold-formed sections are thin and deep, they are prone to twisting and lateral rolling under heavy vertical loads. Installing sag rods at the mid-span or third-points of the bay prevents this rotation, keeping the purlins straight. These tension rods transfer lateral loads back to the stiff eave struts or ridges.
Keeping the secondary framing perfectly straight ensures your roofing screws penetrate the flanges at a clean, right angle.
Key Takeaway: Bolted cleats combined with systematic sag rods prevent thin-gauge steel profiles from twisting under load.
| Connection Detail | Recommended Fastener | Advantages | Field Inspection Method | |
|---|---|---|---|---|
| Purlin-to-Cleat | Grade 8.8 High-Tensile Bolts | Excellent shear transfer, fast assembly | Calibrated torque wrench check | |
| Sag Rod Connection | Threaded Tension Rods | Prevents lateral rotation/twisting | Visual alignment verification | |
| Purlin Lap Joint | Double-bolting pattern | Continuous beam performance | Structural overlay overlap check |
Beyond structural stability, protecting your steel secondary framing from environmental degradation is essential.
Secure your steel building with high-quality roof & wall purlins!
Email:sales@showhoo.com.cn
Phone/WhatsApp: + 86 186 7895 5927
How to protect roof and wall purlins?

How to protect roof and wall purlins from environmental wear requires utilizing hot-dip galvanized coatings and installing high-performance thermal insulation barriers. Ensuring your roof and wall purlins are shielded from corrosion is vital for the long-term safety of any pre-engineered building. Because these members are cold-formed from thin steel sheets, surface rust can rapidly compromise their load-bearing capacity. If moisture is allowed to collect in lap joints or condensation builds up along the ceiling, premature failure can occur.
Specifying the correct protective coating during the design phase is the most effective way to eliminate these corrosion risks. Thermal barriers are also necessary to prevent condensation issues caused by extreme temperature differentials.
Preventing structural corrosion over time
A standard red-oxide primer is cost-effective but requires regular maintenance and painting over the building’s lifecycle. For absolute protection, hot-dip galvanization (such as Z275 or G90 zinc coatings) is the gold standard for industrial applications. The zinc layer provides both physical and sacrificial protection, preventing rust even if the surface gets scratched during erection.
Consider these anti-corrosion coating options for your next project:
- Pre-galvanized Zinc Coating (Z275): Standard B2B choice for long-term corrosion resistance.
- Red Oxide Priming: Cost-effective for low-humidity, controlled indoor environments.
- Powder Coating: Used in specialized projects requiring specific interior aesthetics.
Mitigating thermal bridging risks easily
Now for the secret: because steel is a highly efficient thermal conductor, cold temperatures from the roof panels transfer straight through the purlins into the building. This thermal bridging causes condensation to form on the cold secondary frames, leading to dripping water and ceiling mold. Installing a thermal break tape or insulation block between the cladding and purlin flange solves this issue.
This simple separation layer keeps the interior steel framing above dew-point temperatures to prevent condensation.
Key Takeaway: Combining hot-dip galvanized coatings with thermal insulation barriers prevents corrosion and eliminates condensation issues.
| Protection Method | Target Environment | Minimum Performance | Life Expectancy | |
|---|---|---|---|---|
| Z275 Galvanized | High humidity, industrial | Sacrificial zinc protection | 30+ Years (Maintenance-free) | |
| Red Oxide Primer | Dry interior warehouses | Barrier-only protection | Requires periodic recoating | |
| Thermal Tape Barrier | Climate-controlled zones | Eliminates cold bridging | Prevents framing condensation |
With performance and protection optimized, we can look at the sourcing and logistical steps for your project.
Where to buy quality roof and wall purlins?

Where to buy quality roof and wall purlins requires sourcing directly from established B2B manufacturers that provide structural certifications and pre-punched customization. Sourcing secondary steel components from a qualified manufacturer ensures that your building package meets precise engineering standards. Buying directly from the factory allows you to customize the length, flange width, and pre-punching patterns to match your structural blueprints. This customization eliminates expensive field cutting and punching, saving you significant field labor costs.
When sourcing for large projects, you should verify that the manufacturer uses high-speed roll forming machinery for consistent dimensional accuracy. Certified material reports should also be requested to guarantee the steel’s chemical and tensile properties.
Sourcing for custom steel workshops
Ready to take the next step? Sourcing your secondary steel alongside your primary frame components ensures that all connection points match up perfectly. A direct-from-factory package means your structural bolts, cleats, girts, and purlins arrive at the site bundled and labeled by bay. This organization makes it easy for your installation crews to locate and assemble the correct pieces.
To simplify your B2B procurement process, look for manufacturers that provide:
- Custom-cut lengths to minimize on-site steel scrap.
- Pre-punched bolt holes matching your engineering drawings.
- Full structural steel certifications (SGS, CE, ISO).
Optimizing shipping and transport logistics
Transporting long steel sections can quickly inflate your logistics costs if they are not packaged efficiently. Because C and Z profiles can be nested tightly together, they occupy minimal space in shipping containers or flatbed trucks. This nesting capability allows you to maximize container weight limits, which lowers your overseas shipping costs per ton.
Ensure your shipping team uses steel strapping and protective wooden crates to prevent damage during transport.
Key Takeaway: Nesting your cold-formed steel profiles reduces shipping volume, lowering your overall freight costs.
| Sourcing Milestone | Key Verification | Cost Impact | Recommended Action | |
|---|---|---|---|---|
| 1. Factory Customization | Pre-punched holes & custom lengths | Reduces on-site labor up to 40% | Submit CAD drawings during bidding | |
| 2. Material Quality | Q355 or equivalent tensile test | Guarantees compliance | Request mill test certificates | |
| 3. Logistics Optimization | Tight profile nesting packaging | Minimizes freight shipping volume | Bundled strapping with lift points |
Let us summarize the overall benefits of these secondary steel members and address the most common technical questions.
Conclusion: Optimizing Your Structural Investment
Designing and building pre-engineered steel structures with the right secondary framing eliminates structural risks, cuts labor, and prevents weather penetration. Sourcing high-capacity cold-formed steel sections with pre-punched bolt holes streamlines fabrication and erection. Building safe, long-lasting industrial infrastructure begins with selecting and installing the right secondary framing profiles. To discuss your next project’s requirements with structural experts and request customized CAD pre-punched secondary framing, please contact us today for a free blueprint review.
Secure your steel building with high-quality roof & wall purlins!
Email:sales@showhoo.com.cn
Phone/WhatsApp: + 86 186 7895 5927
Deep-Dive Technical Q&A Section
Can I use C-purlins for both roof and walls?
Yes, C-purlins can be used for both applications. C-purlins are exceptionally versatile and are commonly used as both roof purlins and wall girts in simple, single-span structures. However, for continuous, multi-span roof configurations, Z-purlins are highly recommended because they can be nested to double the structural load capacity at support points.
What’s the best coating to prevent purlin rust?
Hot-dip galvanization is the best coating to prevent rust. Pre-galvanized or hot-dip galvanized finishes (such as Z275 or G90 coating weight) offer superior zinc-sacrificial protection for cold-formed steel. While red-oxide primers are cost-effective for dry indoor areas, they require frequent inspection and do not survive harsh outdoor or coastal environments.
How do I know if my purlin spacing is too wide?
You will notice visible deflection or sag in the cladding panels. If you observe excessive sagging in the roof sheets, severe panel vibrations during wind storms, or water pooling, your spacing is too wide. These symptoms indicate that the structural spacing exceeds code limits or the steel gauge is too thin to support local load conditions.
Can I weld purlins instead of bolting them?
No, welding cold-formed thin steel purlins is highly discouraged. Standard cold-formed purlins are fabricated from thin-gauge steel that is coated with protective zinc. Welding burns away this zinc layer, causing rapid localized corrosion, and the intense heat can easily warp the thin profile or weaken its cold-worked strength.
What’s the best way to calculate purlin sag?
The safest way is to utilize professional cold-formed steel design software. Designers must calculate sag and deflection using local engineering standards and wind/snow loads. Utilizing American Iron and Steel Institute specifications or specialized finite element analysis ensures that wind uplift, dead loads, and structural spans are accurately calculated.