
Preparing the brooding house requires a strict, multi-step regimen of deep cleaning, sanitization, preheating, and precise climate setup to ensure the survival and development of day-old chicks. Day-old chicks have extremely fragile immune and thermoregulatory systems, making them highly vulnerable. A single cold draft, missed pathogen, or uneven temperature zone can lead to rapid flock mortality and devastate your profits. Establishing a highly optimized brooding house environment is the ultimate shield to protect your investment and secure early-stage growth.
Why is deep cleaning a brooding house so critical?
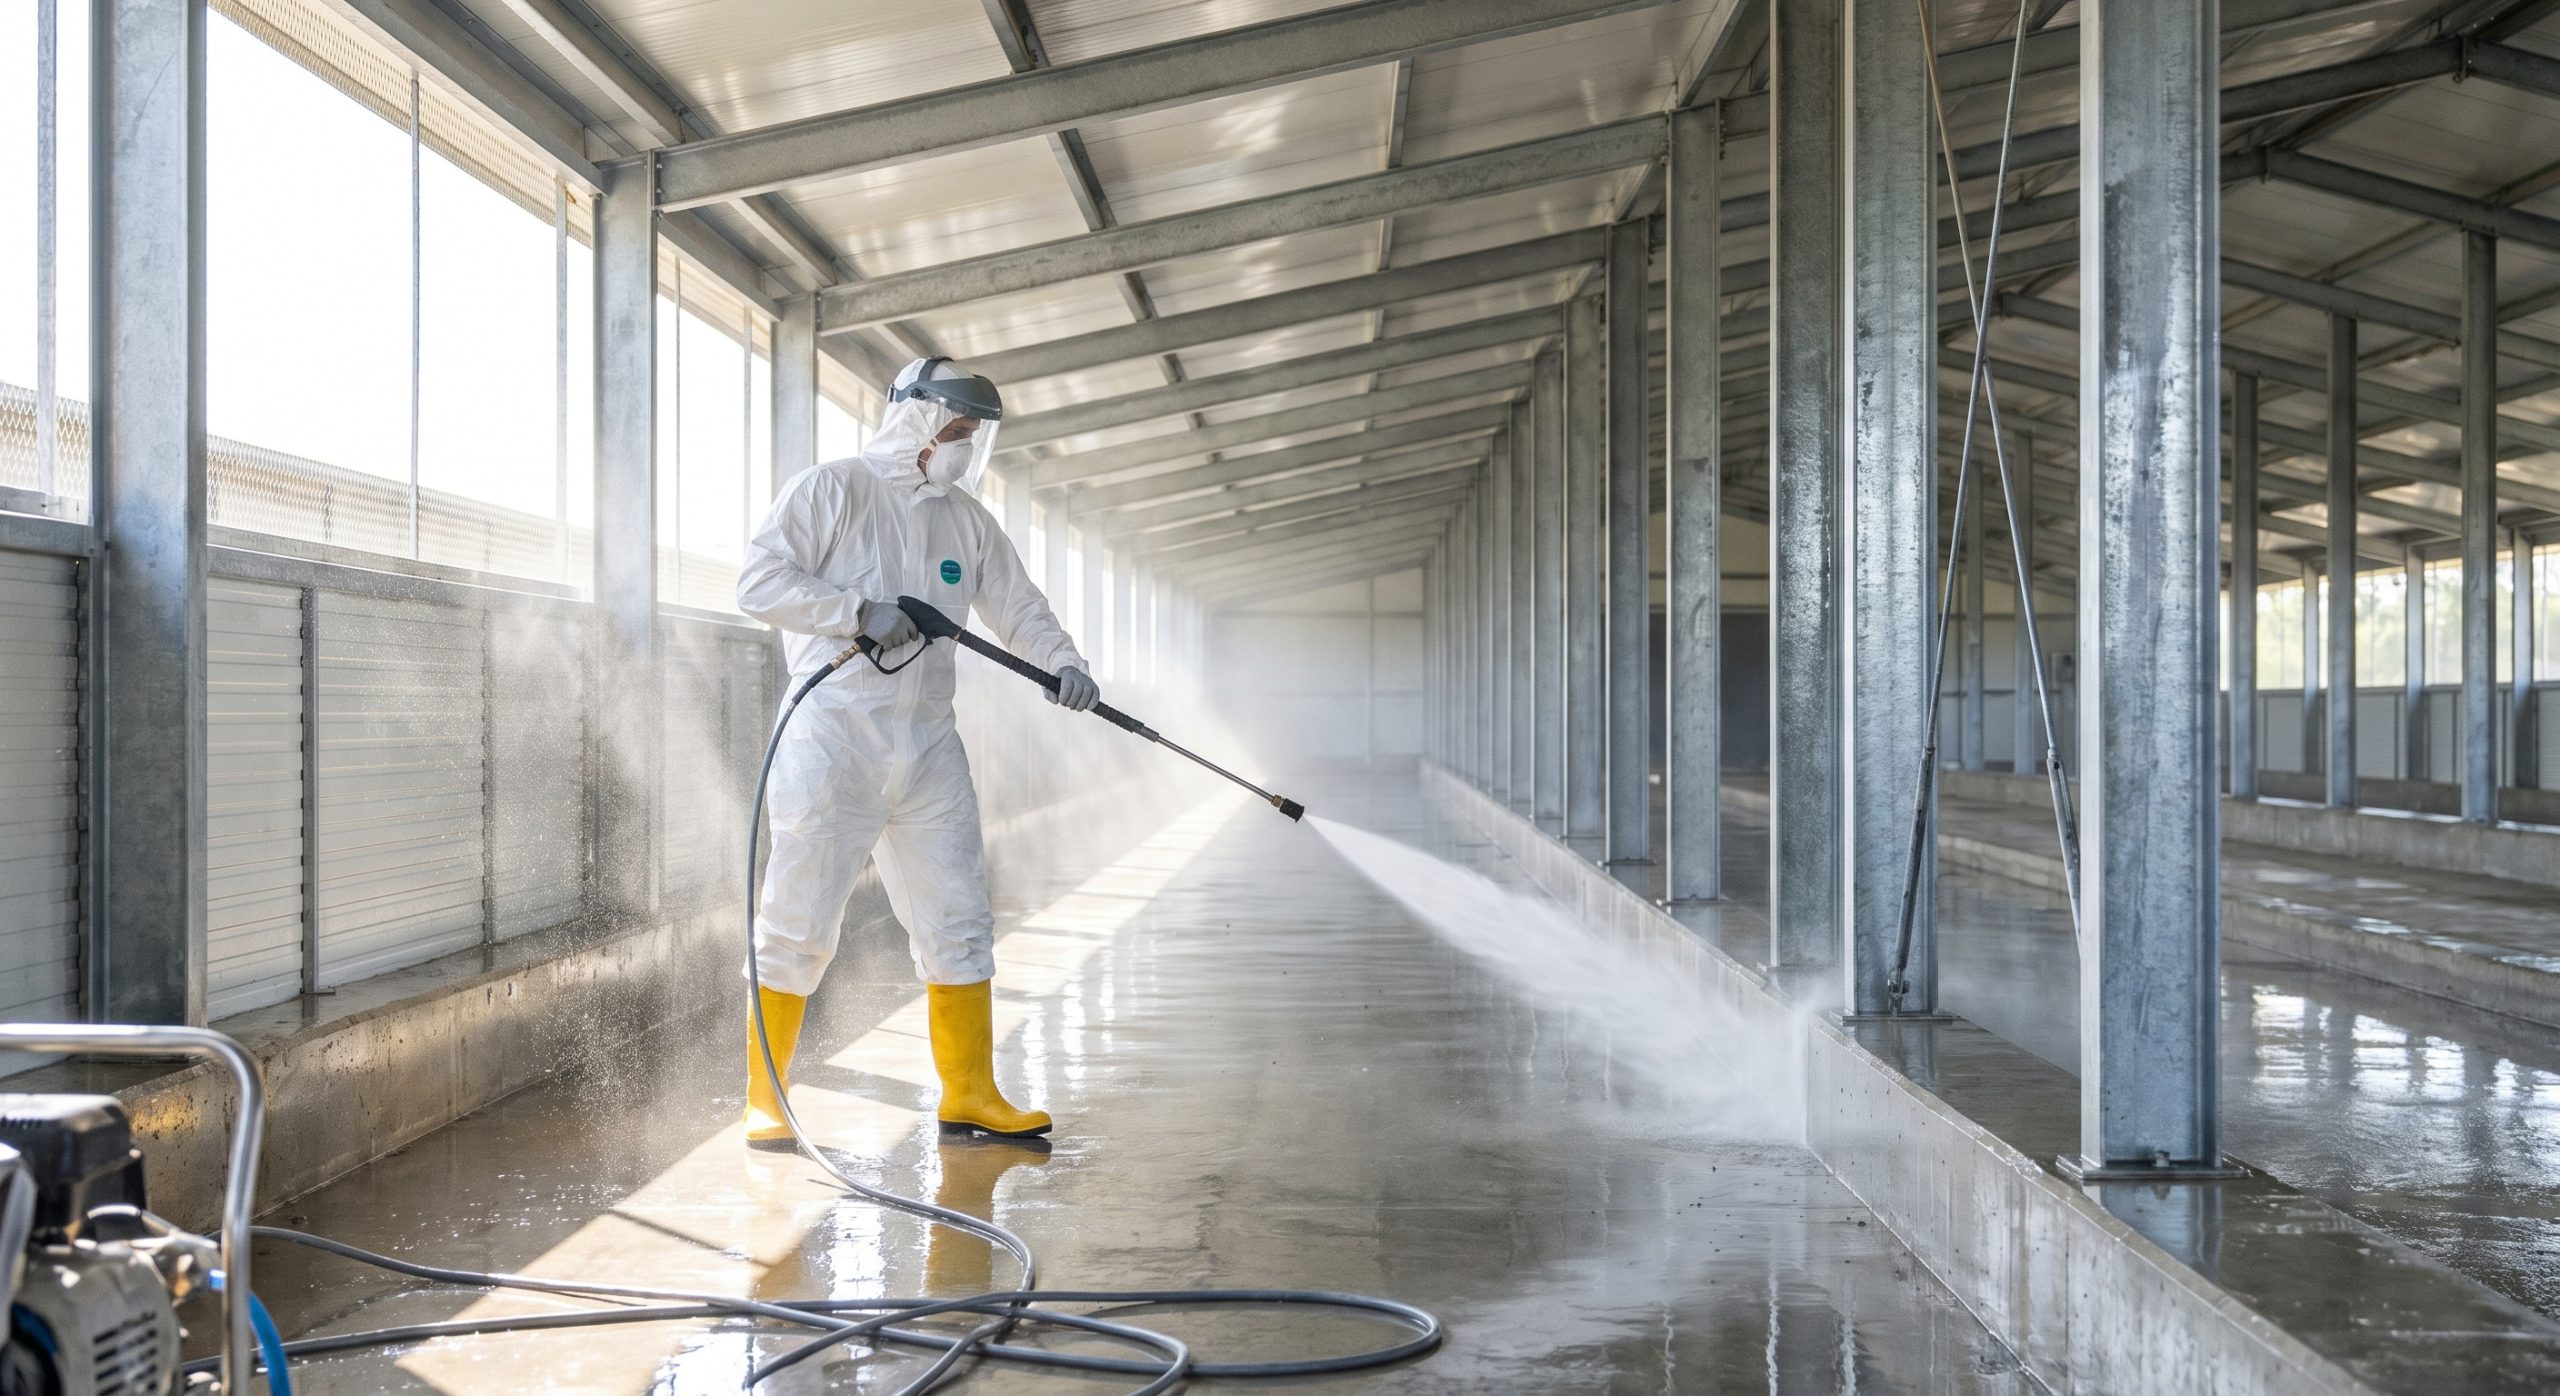
Deep cleaning is critical because it removes organic matter that harbors deadly pathogens from the previous flock. To ensure your new chicks start in a completely sterile environment, you must physically remove all dust, manure, and feed residues from the brooding house. This proactive step dramatically reduces early-stage mortality. It also maximizes the chemical efficacy of your chosen sanitizers.
Neglecting this initial step will compromise any subsequent disinfection efforts you make on your farm. Organic debris acts as a physical shield for bacteria, rendering chemical sprays virtually useless. Let’s look at how to structure this process effectively.
How do you perform the initial dry cleaning?
Dry cleaning requires stripping the entire room of old litter and sweeping down all surfaces from top to bottom. This step should be initiated immediately after the previous flock is completely depopulated.
Think about it:
- Remove all old manure and organic waste immediately.
- Sweep ceilings, walls, and structures to clear cobwebs and dust.
- Vacuum electrical boxes and control panels safely.
Doing this prevents organic dust from neutralizing your wet cleaning solutions. Always work from the top down so gravity helps clear debris.
What does the wet washing phase involve?
The wet washing phase involves using high-pressure washers and heavy-duty detergents to break down stubborn organic films. This process physically detaches caked-on fecal matter and dirt from the walls.
Here’s the deal:
- Apply a high-quality foam detergent to soak all surfaces.
- Use hot water high-pressure washers at 150 to 200 bar.
- Scrub corners, feeders, and drinking systems manually.
Once completed, let the facility dry completely before applying disinfectants. Adequate drying time ensures chemical sanitizers are not diluted.
Key Takeaway: Thorough dry and wet cleaning reduces the pathogen load by up to 90%, giving your chicks a clean slate to grow and preventing early-stage disease outbreaks.
| Step | Action Required | Key Equipment | Target | |
|---|---|---|---|---|
| Dry Clean | Sweeping and litter removal | Brooms, vacuums | 100% dry organic matter removed | |
| Wet Wash | High-pressure washing and foaming | Pressure washer, detergent | Deep biofilm removal |
Conducting these steps systematically ensures that the structural components of your facility are preserved while eradicating biological risks.
How do you disinfect a brooding house effectively?
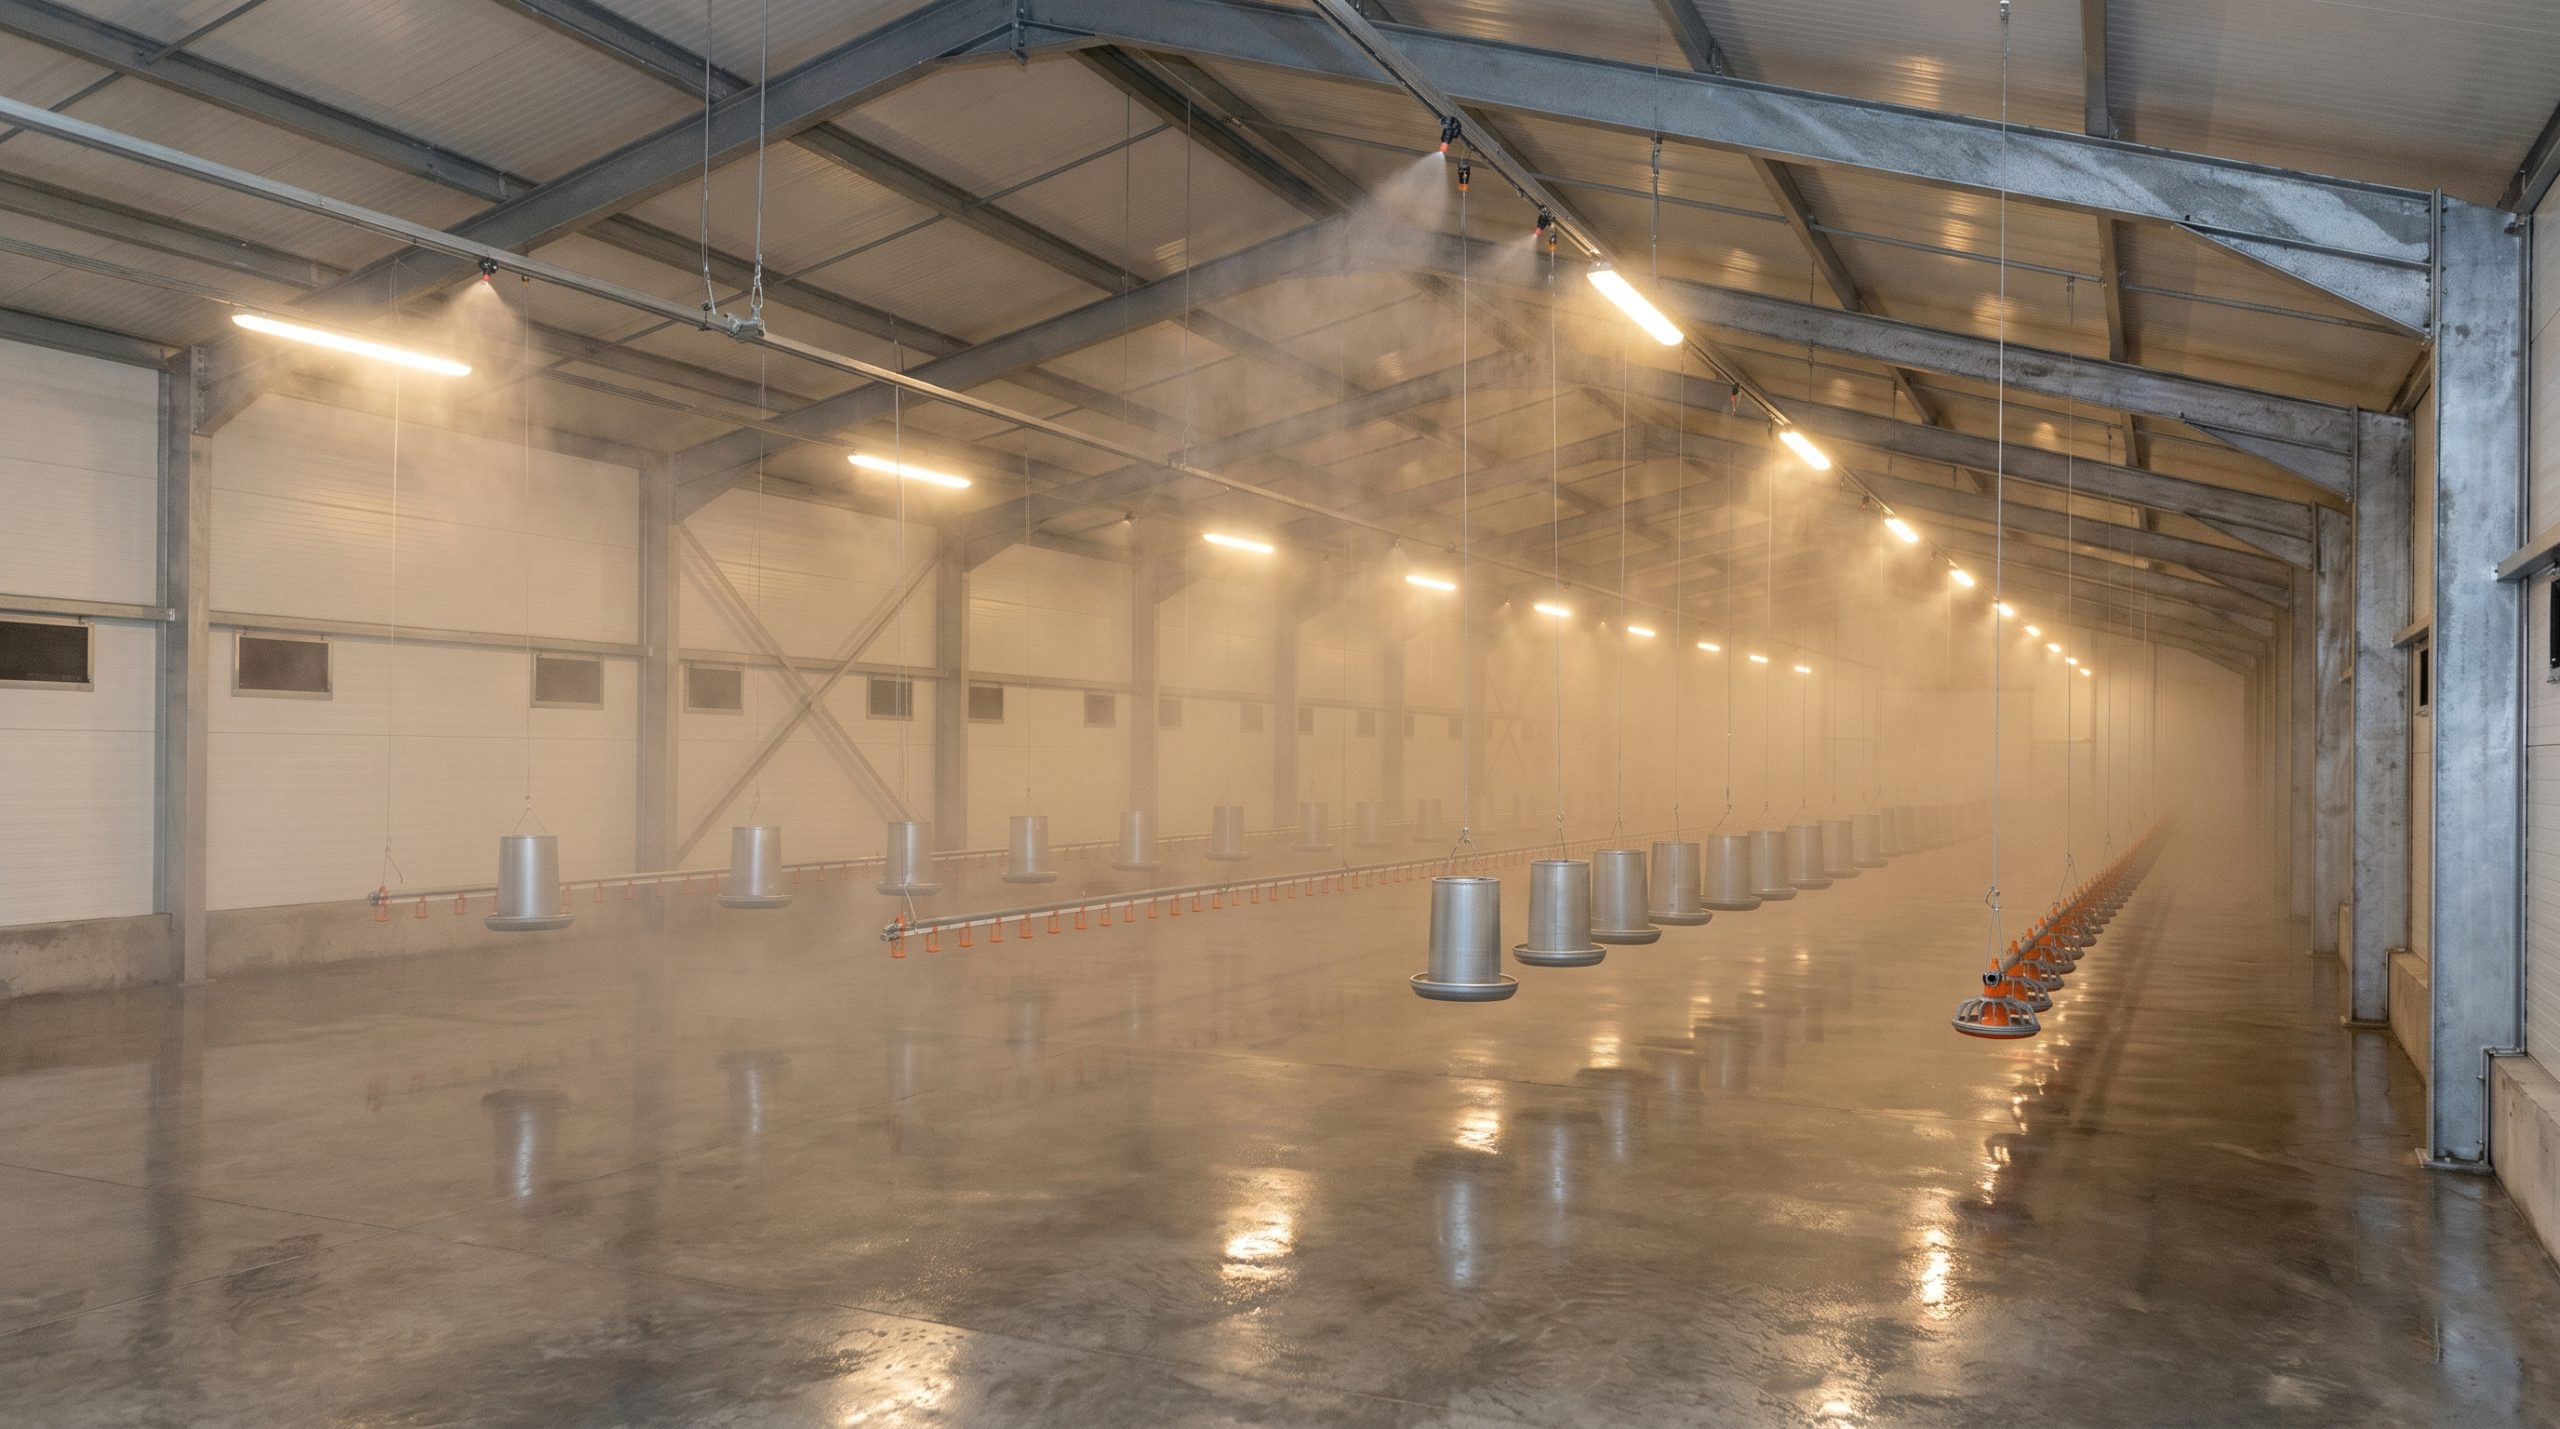
You disinfect effectively by applying broad-spectrum chemical agents to clean, dry surfaces to eliminate microscopic pathogens. Disinfecting the brooding house correctly is your primary defense against persistent viruses, bacteria, and fungal spores. This sanitizing phase must cover every ceiling frame, wall panel, and support column. A comprehensive liquid application ensures no pathogen survives to infect the next cycle.
Selecting the right chemical and applying it at the correct concentration will secure the health of your flock. Skipping this step allows dormant pathogens to quickly multiply once the room is warmed. Let us explore the best approaches to accomplish this.
Which disinfectants should you choose?
Choosing the right disinfectant depends on the specific pathogens you need to target and your local climate conditions. You must select a product with proven efficacy against a broad range of agricultural diseases.
Let’s face it:
- Use glutaraldehyde-quaternary ammonium combinations for broad-spectrum coverage.
- Apply oxidizing agents like peracetic acid for cold-weather applications.
- Deploy synthetic phenols on concrete floors for long-lasting residual action.
Ensure you strictly follow manufacturer dilution rates to guarantee effectiveness without damaging equipment. Incorrect dosing can leave resilient viral strains completely active.
How do you perform the final fumigation?
Final fumigation is done by sealing the house and releasing gas to sterilize hard-to-reach cracks. This step acts as an extra layer of protection for complex steel structures.
But wait, there’s more:
- Seal all air inlets, doors, and exhaust fans tightly.
- Use formalin and potassium permanganate or specialized thermal foggers.
- Leave the house sealed for a minimum of 24 hours.
Ventilate the space thoroughly for 24 to 48 hours before placing any chicks inside. This ensures the air is completely free of chemical residue.
Key Takeaway: Proper disinfection and fumigation break the disease cycle between flocks, safeguarding your high-density investments from devastating horizontal transmissions.
| Method | Chemical Type | Contact Time | Primary Target | |
|---|---|---|---|---|
| Spraying | Glutaraldehyde / QAC | 30 minutes | Bacteria, viruses on surfaces | |
| Fumigation | Formalin gas / Fogger | 24 hours | Pathogens in structural crevices |
Always monitor environmental humidity during disinfection, as dry air can significantly reduce the efficacy of gaseous sterilizing agents.
Secure your chicks growth—optimize your brooding house now!
Email:sales@showhoo.com.cn
Phone/WhatsApp: + 86 186 7895 5927
Why does preheating the brooding house protect chicks?
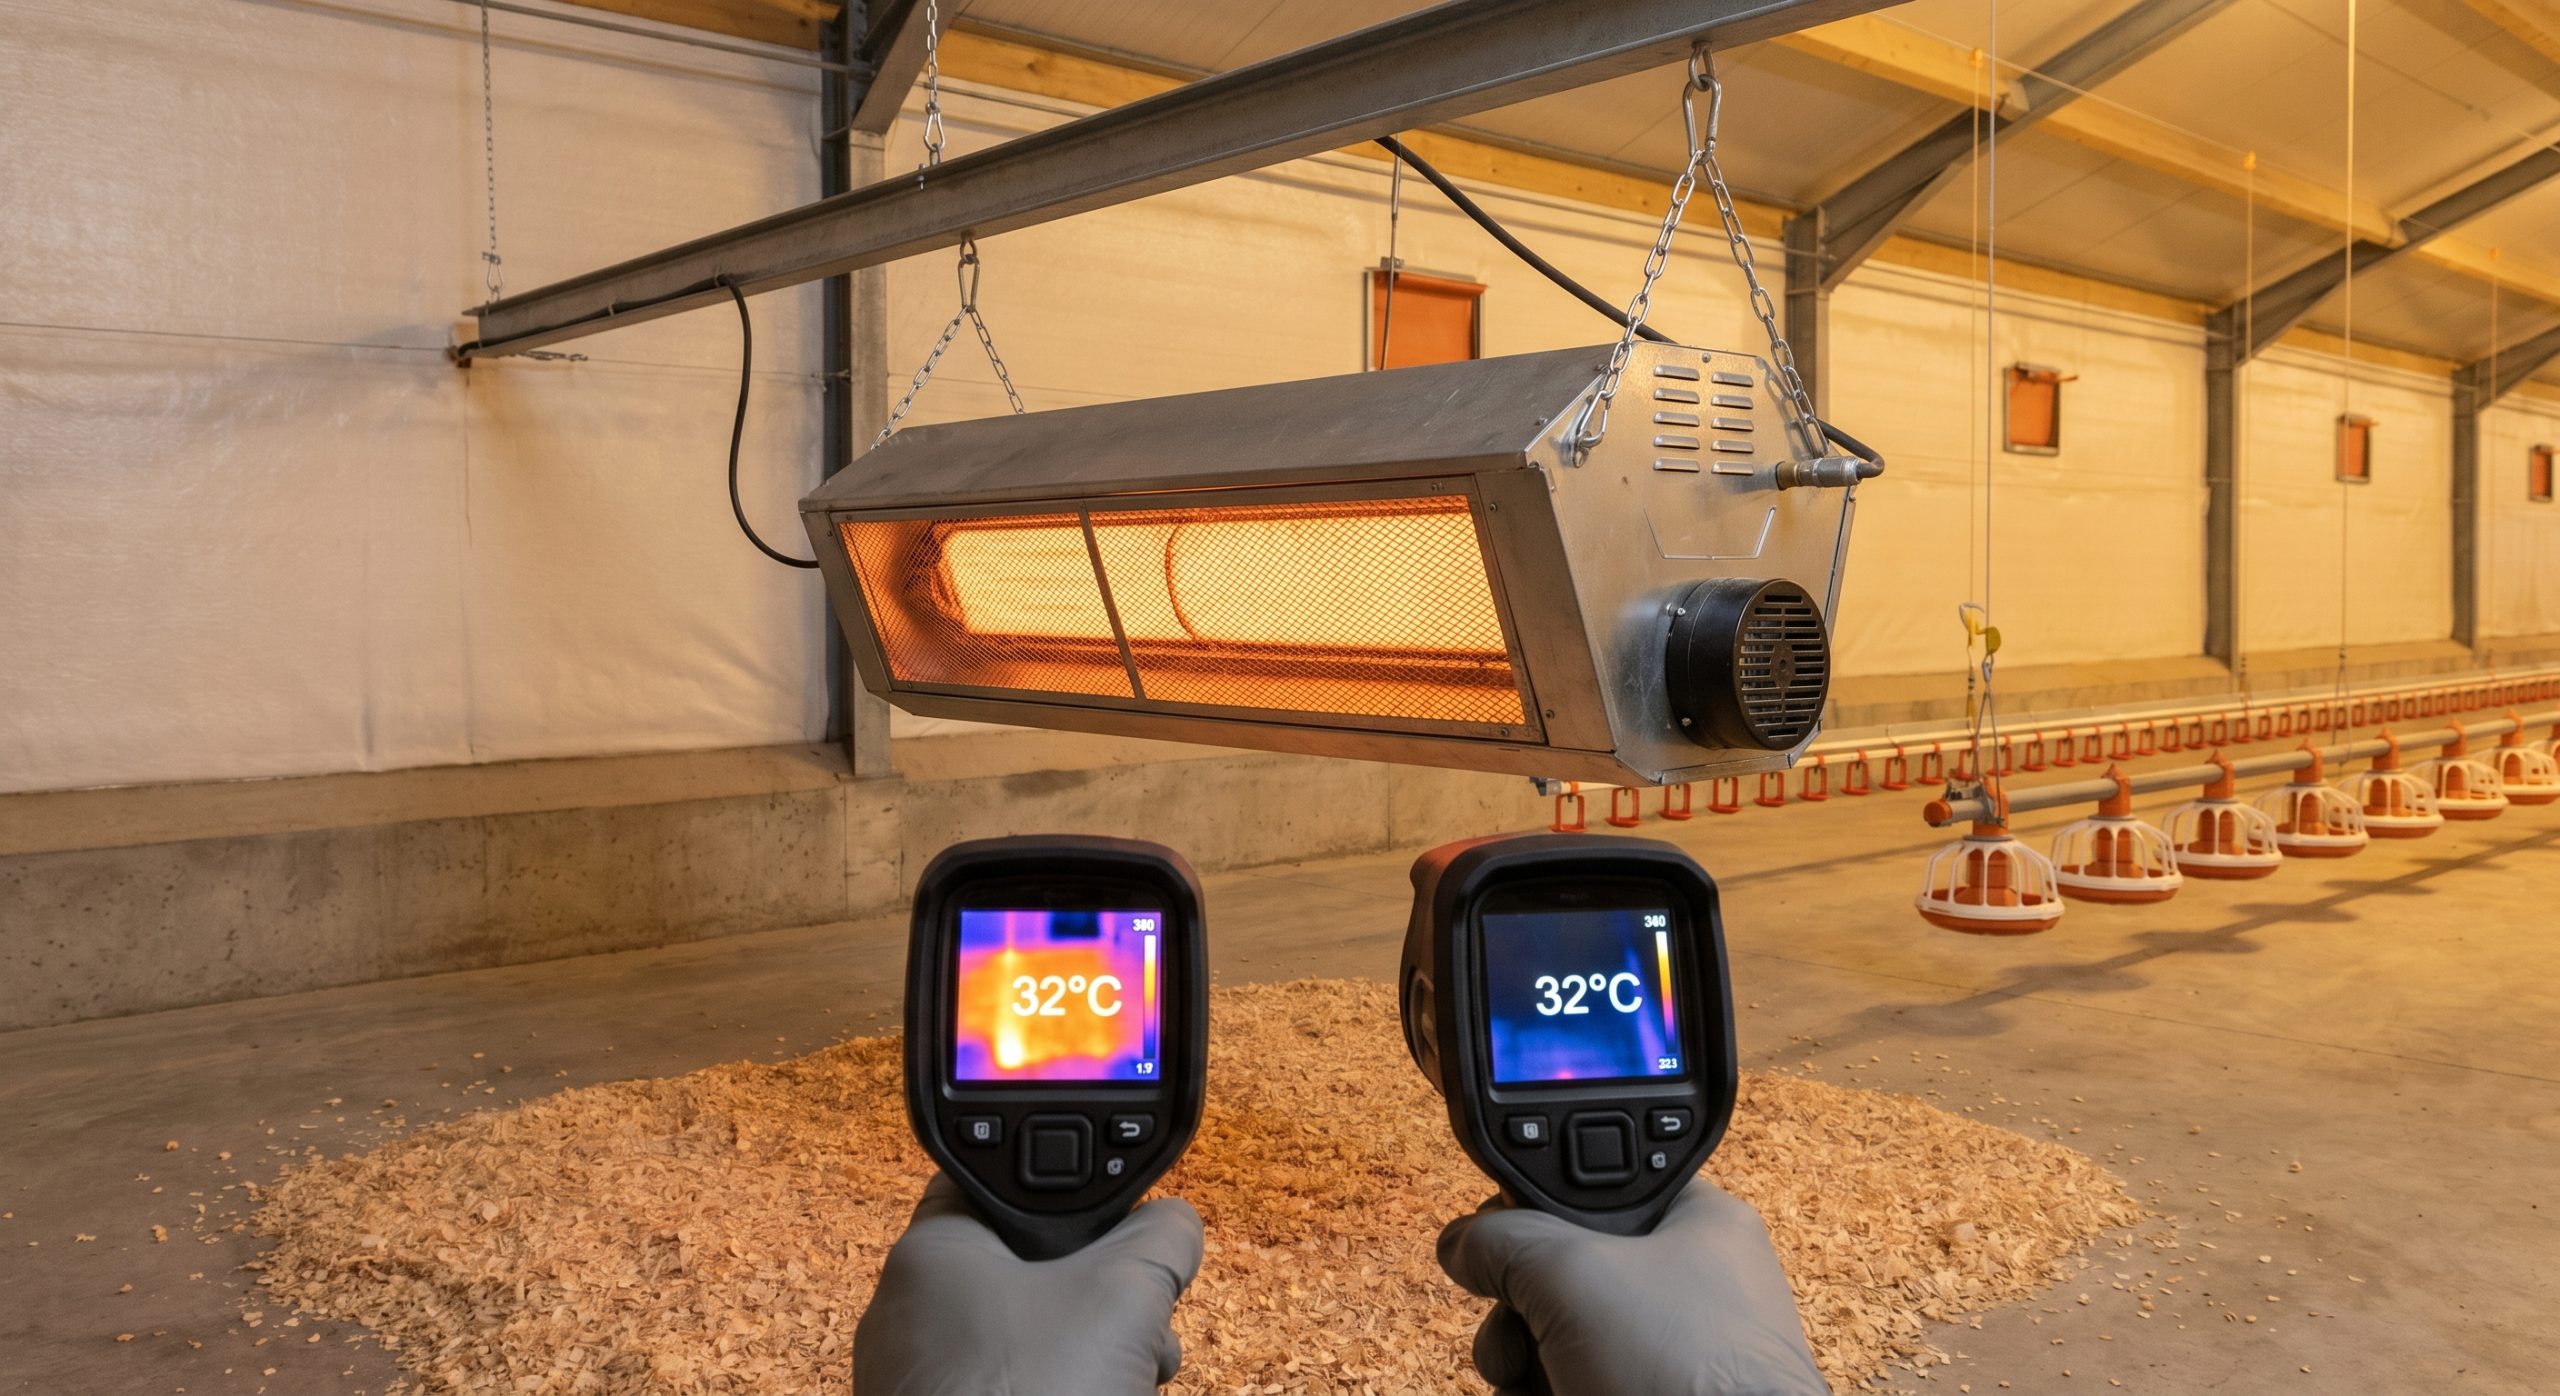
Preheating protects chicks because they cannot regulate their own body temperature during the first week of life. Running the heating system in the brooding house early ensures that both the air and floor temperatures are perfectly stabilized before delivery. This rapid temperature normalization prevents the birds from suffering thermal shock. It also encourages them to explore and feed immediately.
Cold concrete floors will drain heat directly from the chicks’ feet and bellies, causing chilling and digestive failure. Preparing this environment in advance is the best way to safeguard early investments. Let’s establish a strict preheating protocol.
When should you start preheating?
You should start preheating at least 24 to 48 hours before the chicks are scheduled to arrive on your farm. This timeline depends on the season and your geographic location.
Why does this matter?
- Begin heating 48 hours early during cold winter seasons.
- Start heating 24 hours early in warmer, tropical climates.
- Run heaters continuously to warm the concrete foundation, not just the air.
This ensures that the deep subfloor reaches a stable temperature, preventing cold spots that cause crowding. A warm floor prevents chicks from losing vital core body heat.
How do you verify even heat distribution?
Verifying even heat distribution requires measuring temperature levels at chick height across multiple zones of the building. Doing so ensures there are no cold corners that could cause chick crowding.
The best part?
- Use hand-held infrared thermometers to check the floor temperature.
- Verify that floor temperatures reach a minimum of 32 degrees Celsius.
- Adjust space heaters and air circulation fans to eliminate thermal pockets.
Consistently monitoring these levels ensures your chicks remain active and spread out evenly to find feed. Comfortable chicks will immediately begin foraging.
Key Takeaway: Preheating guarantees that chicks do not waste valuable energy on thermal regulation, allowing them to focus fully on feed consumption and immune development.
| Parameter | Target Temperature | Measurement Tool | Ideal Condition | |
|---|---|---|---|---|
| Air Temperature | 33°C to 35°C | Digital hanging sensor | Uniform throughout zone | |
| Floor/Litter Temp | 32°C minimum | Infrared laser gun | Warm to the touch |
Achieving thermal equilibrium between the concrete subfloor and the upper air layer prevents chick huddling and asphyxiation.
How do you setup brooding house feeding lines?
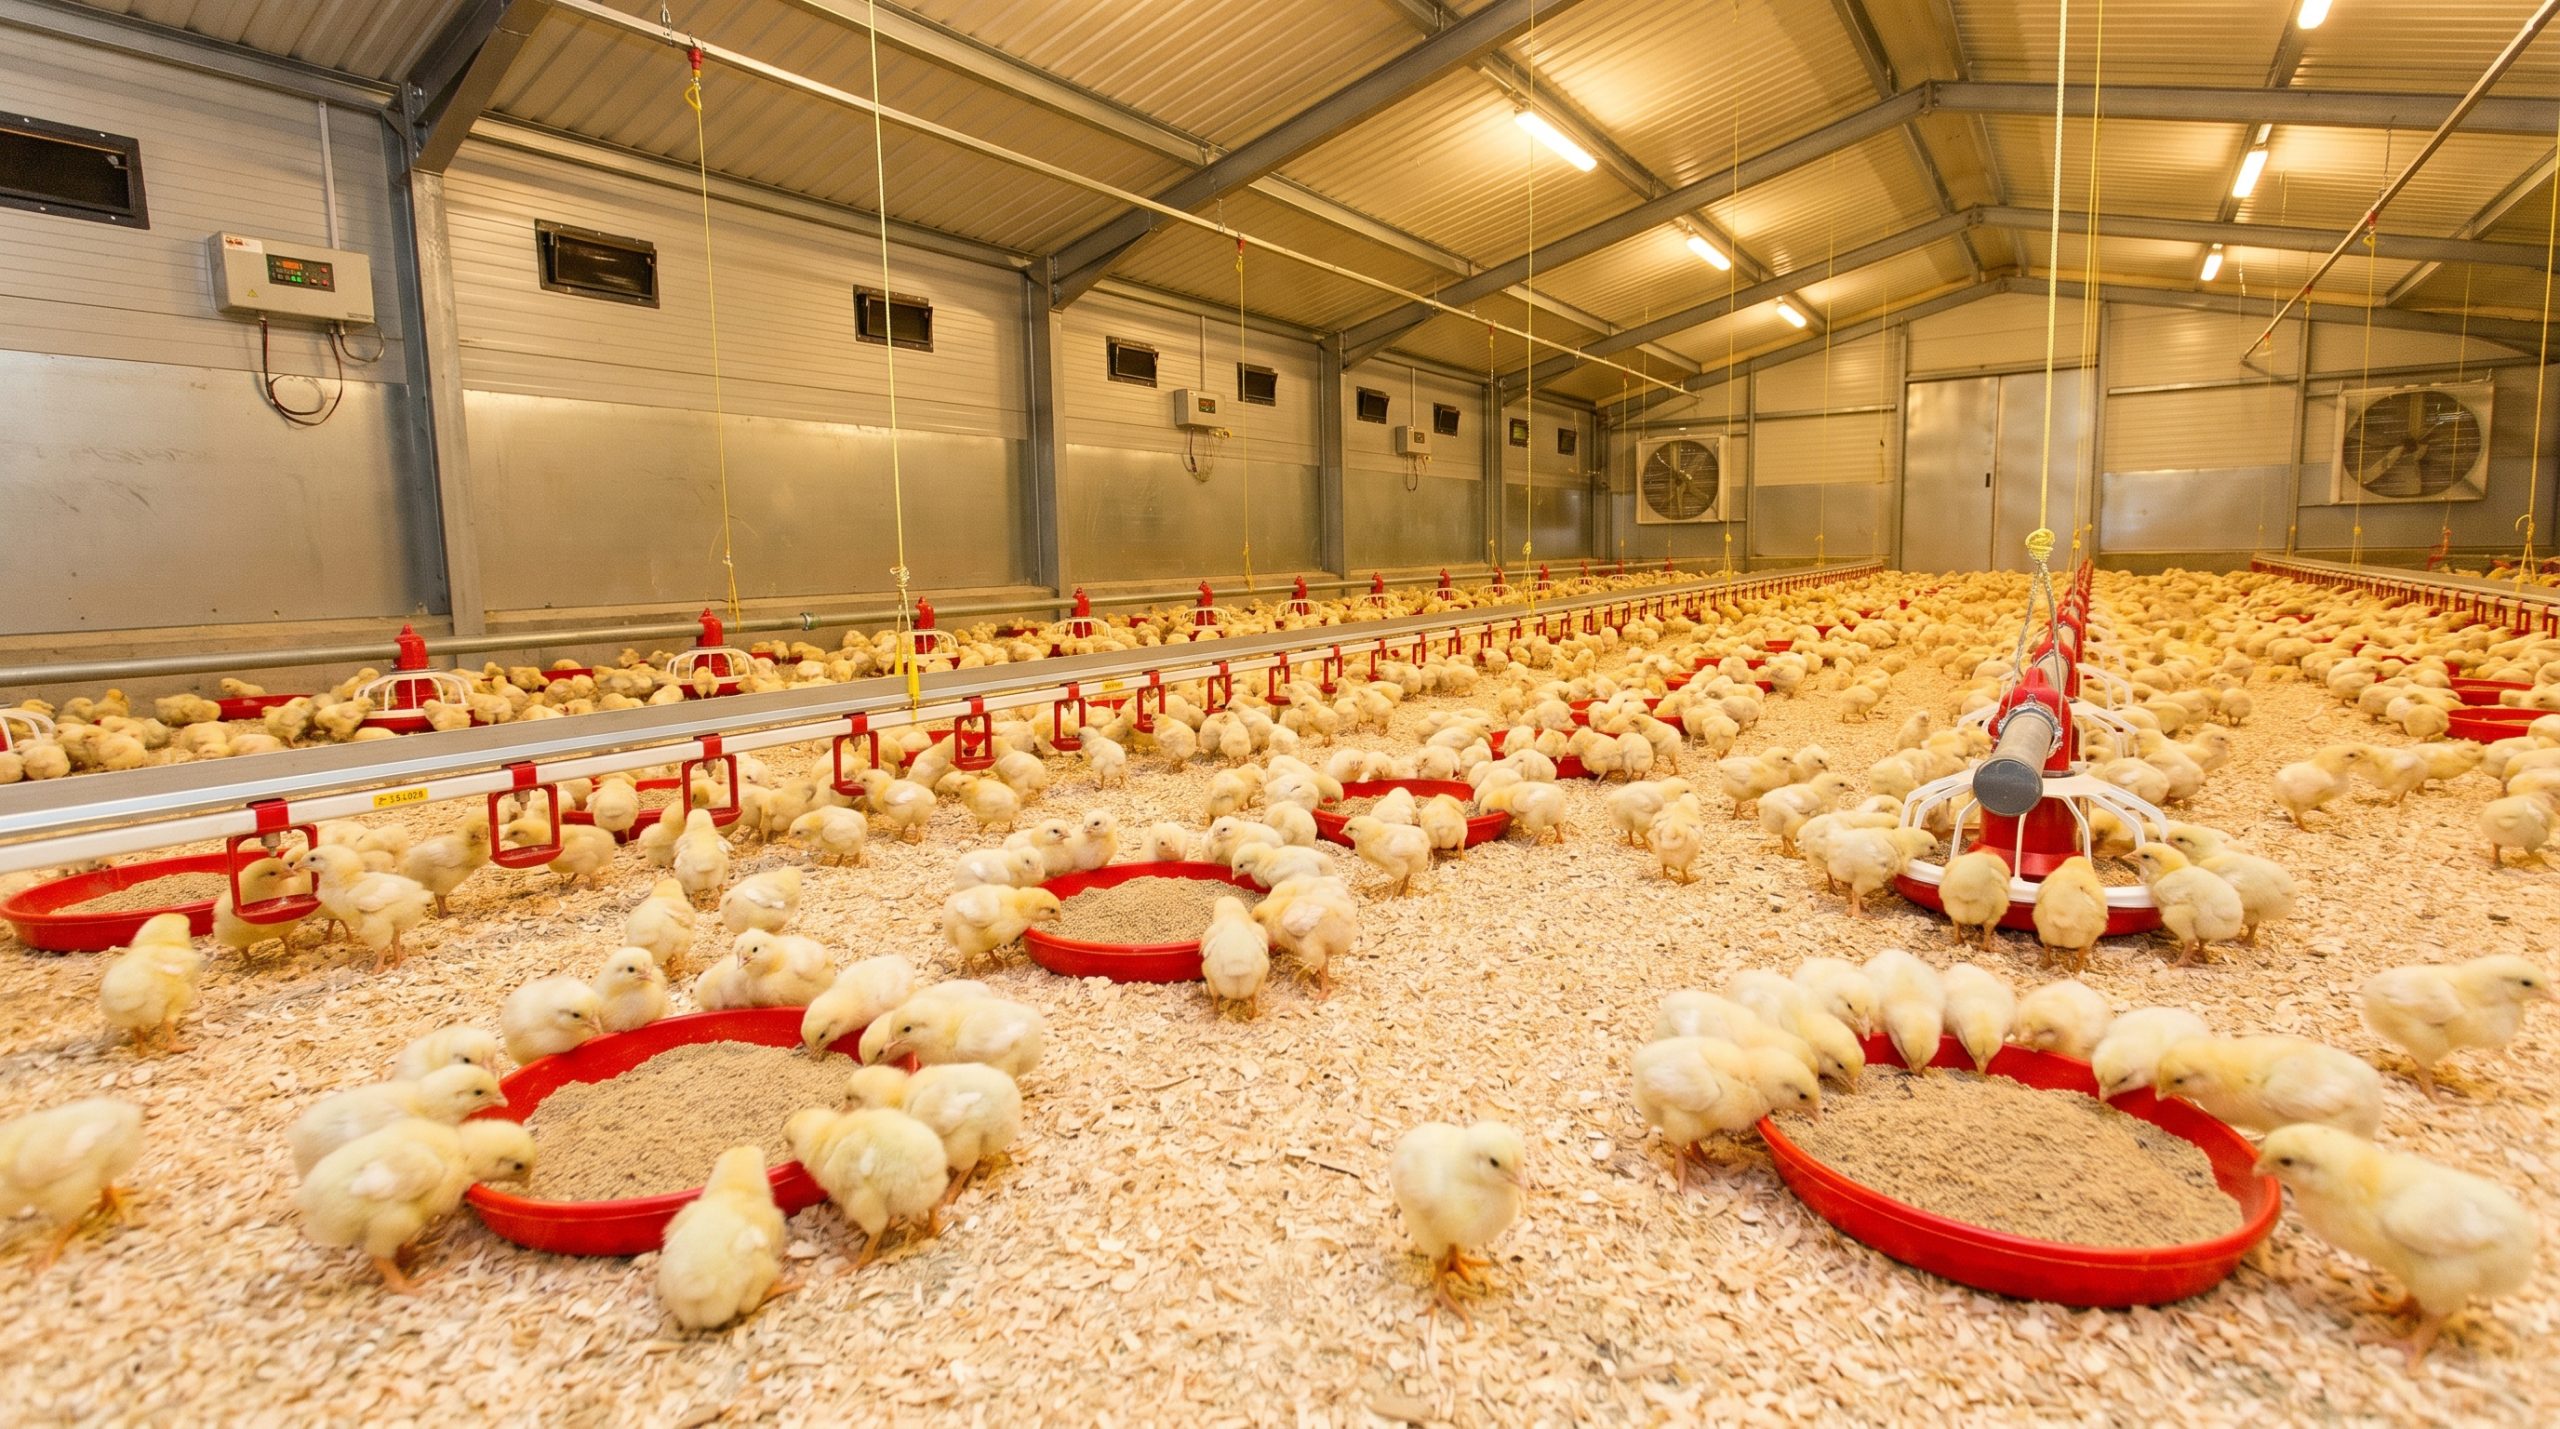
Setting up feeding lines requires adjusting feeder height to the chicks’ eye level and distributing supplementary paper feed. Preparing the feeding systems within your brooding house ensures immediate access to highly digestible nutrients from their very first hour. This early accessibility triggers rapid gut development and accelerates yolk sac absorption. It also lays the foundation for excellent flock weight uniformity.
Proper feeder height prevents feed wastage while encouraging continuous consumption. Let us look at how to structure this feed distribution system perfectly.
How do you arrange supplementary feeding?
Supplementary feeding is arranged by laying down biodegradable paper sheets and filling extra trays within the brooding area. This ensures that every chick can find food without having to search.
Think about it:
- Cover at least 50% of the brooding floor with paper.
- Distribute high-quality crumble feed over the paper sheets.
- Place extra manual chick feeder trays near water lines.
This setup guides chicks effortlessly from feed to water, reducing search time and boosting feed conversion. The rustling sound of paper also naturally attracts other chicks to feed.
How do you manage automatic feed lines?
Managing automatic lines involves adjusting pan heights and sensor triggers to match the physical height of the birds. This step must be performed before the flock arrives.
Here’s the deal:
- Lower automated feed pans to rest flat on the bedding material.
- Set feed levels in pans to maximum depth for easy access.
- Test automated auger sensors to prevent feed empty zones.
Keeping feed fresh and clean prevents digestive issues and keeps chicks eager to consume nutrition. Make sure the height is adjusted upward as they grow.
Key Takeaway: Designing an easily accessible feeding grid ensures maximum flock uniformity, allowing weaker chicks to feed comfortably alongside stronger ones.
| Feeding Component | Area Coverage | Height Position | Feed Depth | |
|---|---|---|---|---|
| Brooder Paper | 50% to 75% of floor | Flat on litter | 50 grams per chick | |
| Automated Pans | 100% of line | Resting on floor | Maximum flood level |
Providing abundant feed surface area during the first three days maximizes early weight gains and uniform flock development.
Why is brooding house water quality so vital?
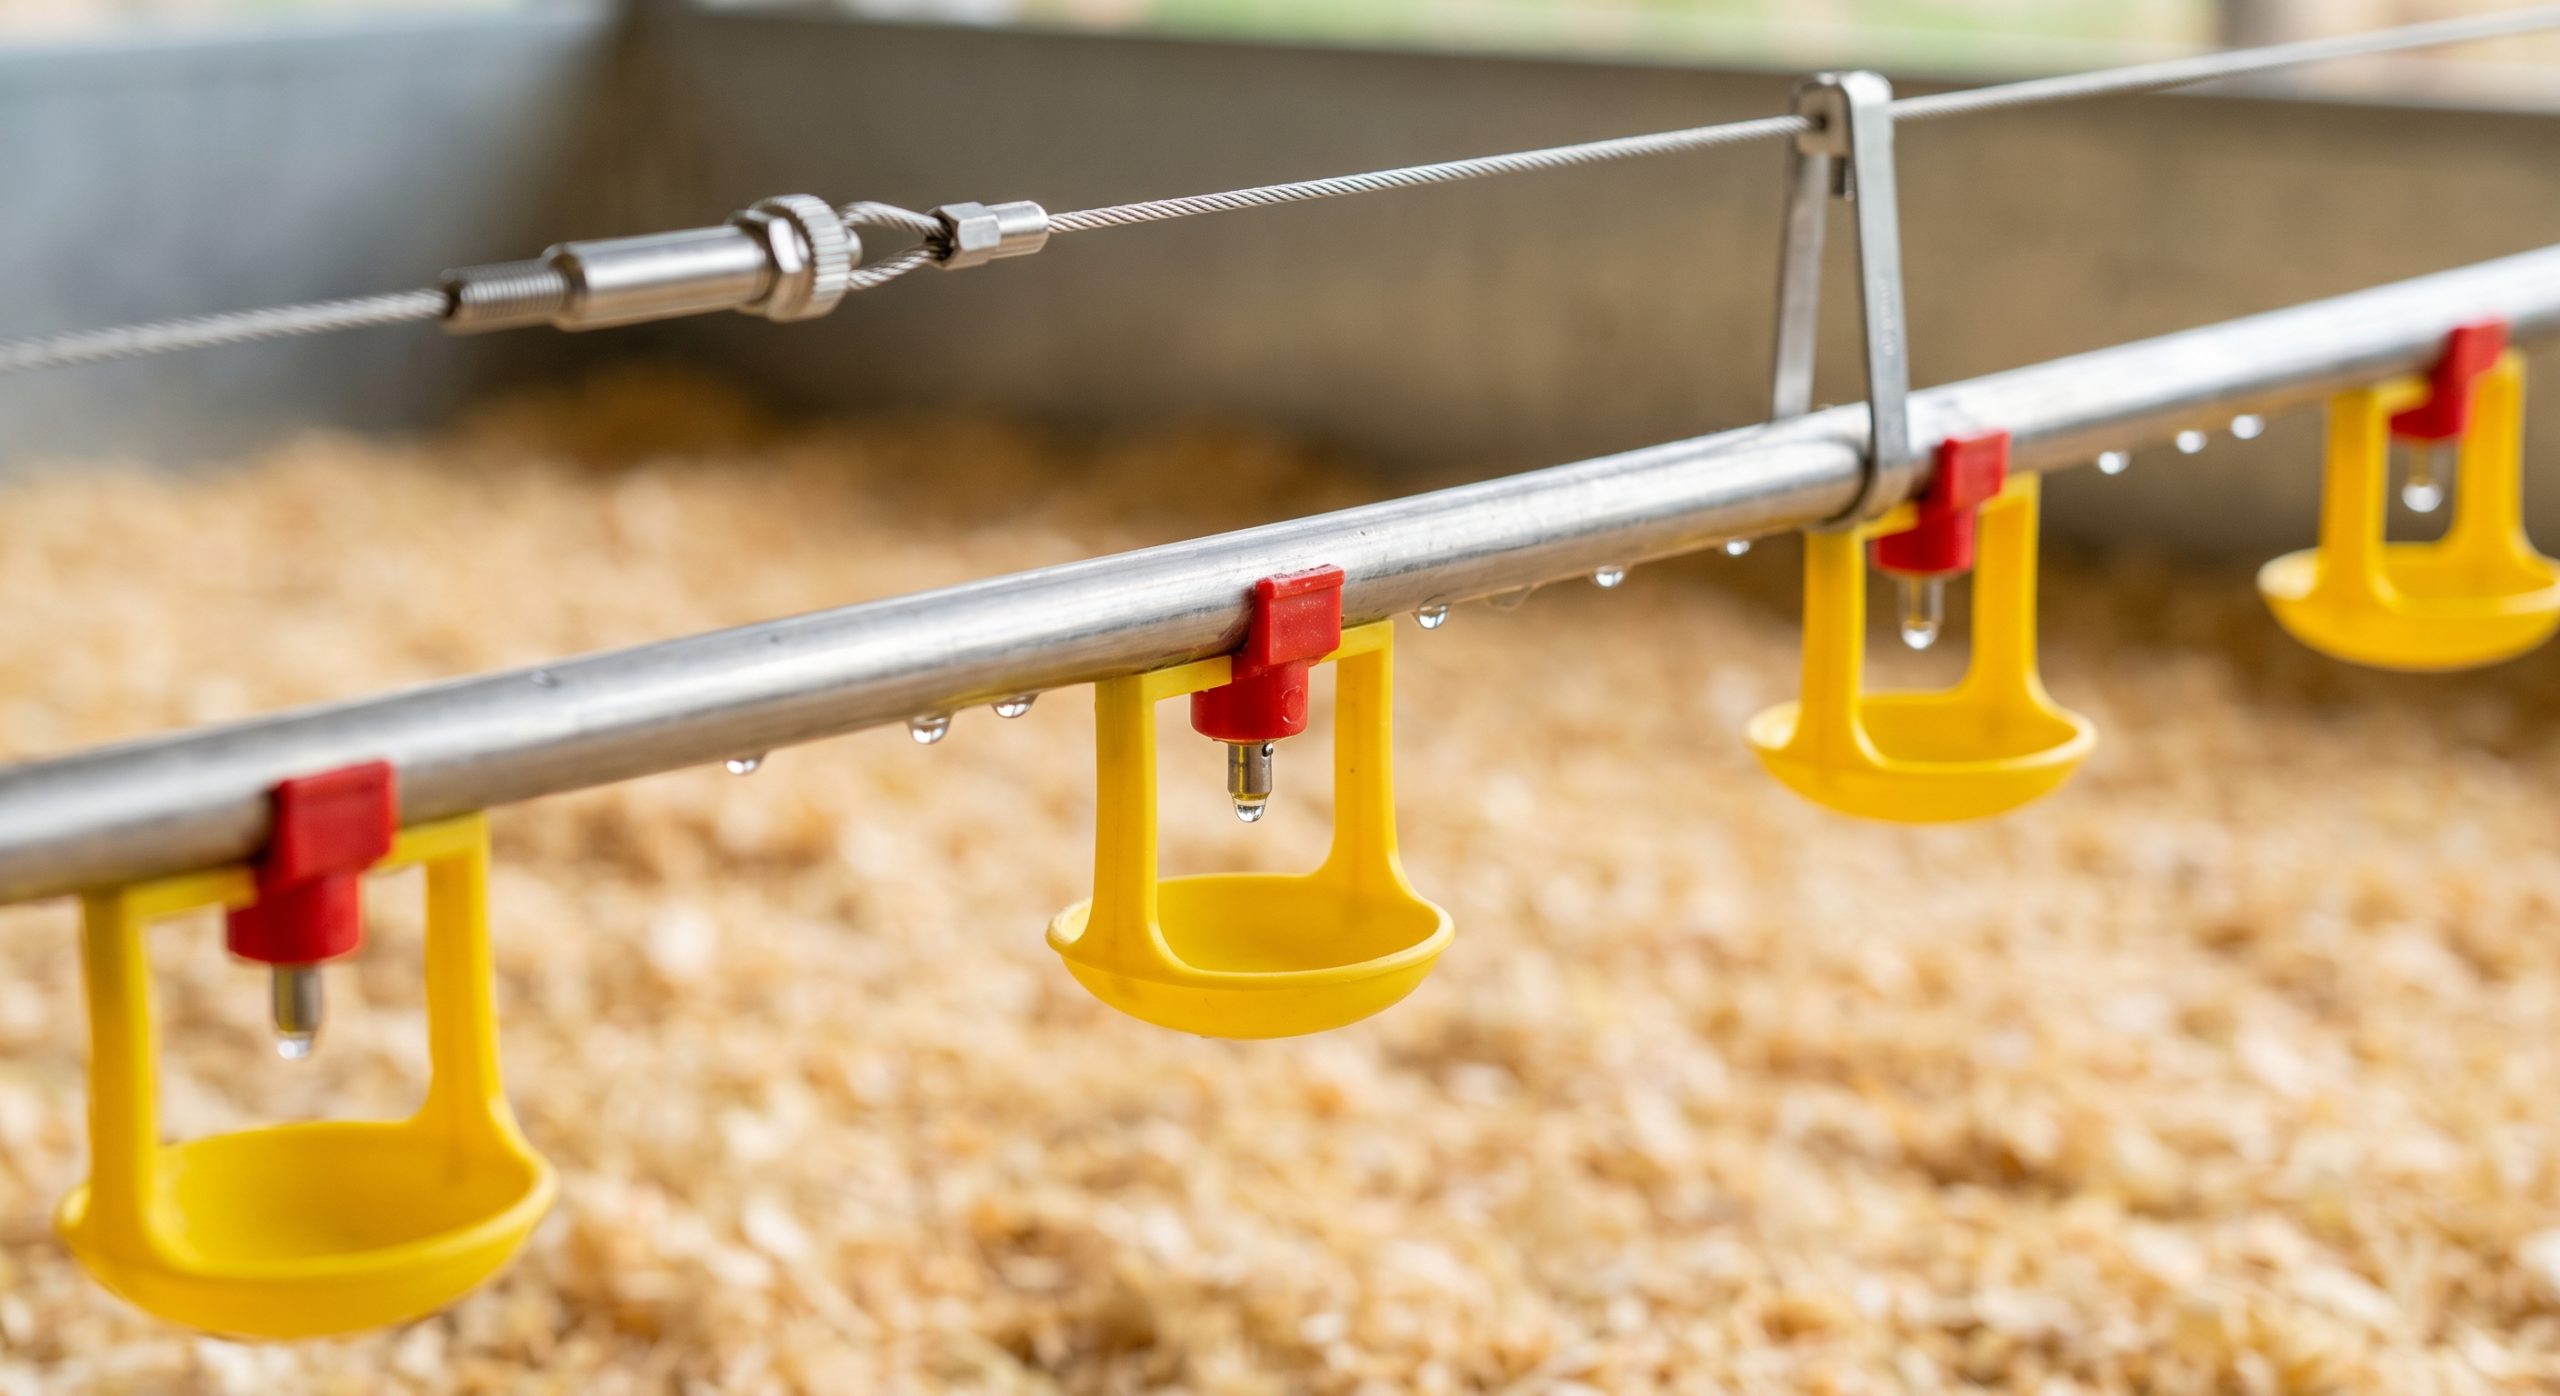
Water quality is vital because it is the most critical nutrient for a chick’s early metabolic processes. Ensuring clean, pathogen-free water flows through the brooding house is essential to prevent dehydration and intestinal infections. Small chicks consume more water than feed, making high sanitary standards non-negotiable. Clean drinking lines directly impact the feed conversion ratio of your flock.
Stagnant water lines from previous flocks can harbor thick biofilms that contaminate fresh water. Taking proactive measures with your water system prevents these invisible biological hazards.
How do you flush and sanitize water lines?
Flushing and sanitizing water lines requires using high-concentration organic acids or hydrogen peroxide solutions to strip out biofilms. This procedure must be done while the house is completely empty.
Let’s face it:
- Pump a 1-2% hydrogen peroxide solution through all water lines.
- Allow the sanitizer to sit inside the pipes for 12 to 24 hours.
- High-pressure flush the system with clean water until it runs clear.
This chemical flush removes mineral scale and biological buildup that clog nipple drinkers and harbor disease. It ensures the water arriving at the chick is perfectly safe.
How do you optimize water pressure?
Optimizing water pressure involves adjusting regulatory valves so chicks can easily activate the nipples without getting wet. Correct pressure settings are crucial for maintaining dry litter.
But wait, there’s more:
- Set initial water pressure low to allow easy droplet formation.
- Adjust the height of the drinking lines to chick eye level.
- Test every single nipple to ensure they do not leak or lock.
Low-pressure water lines ensure chicks drink easily while keeping the floor bedding dry and sanitary. As they grow, pressure should be increased gradually.
Key Takeaway: Providing clean, easily accessible water encourages maximum feed intake, which is essential for rapid early skeletal and muscle growth.
| Parameter | Target Range | Sanitization Agent | Testing Frequency | |
|---|---|---|---|---|
| Water pH | 5.5 to 6.8 | Citric or organic acid | Weekly | |
| Pressure | Low (droplet stage) | Hydrogen peroxide flush | Before flock arrival |
Maintaining slightly acidic water of high biological purity prevents pathogenic bacterial colonization in the chick’s immature digestive tract.
How do you choose the best brooding house bedding?
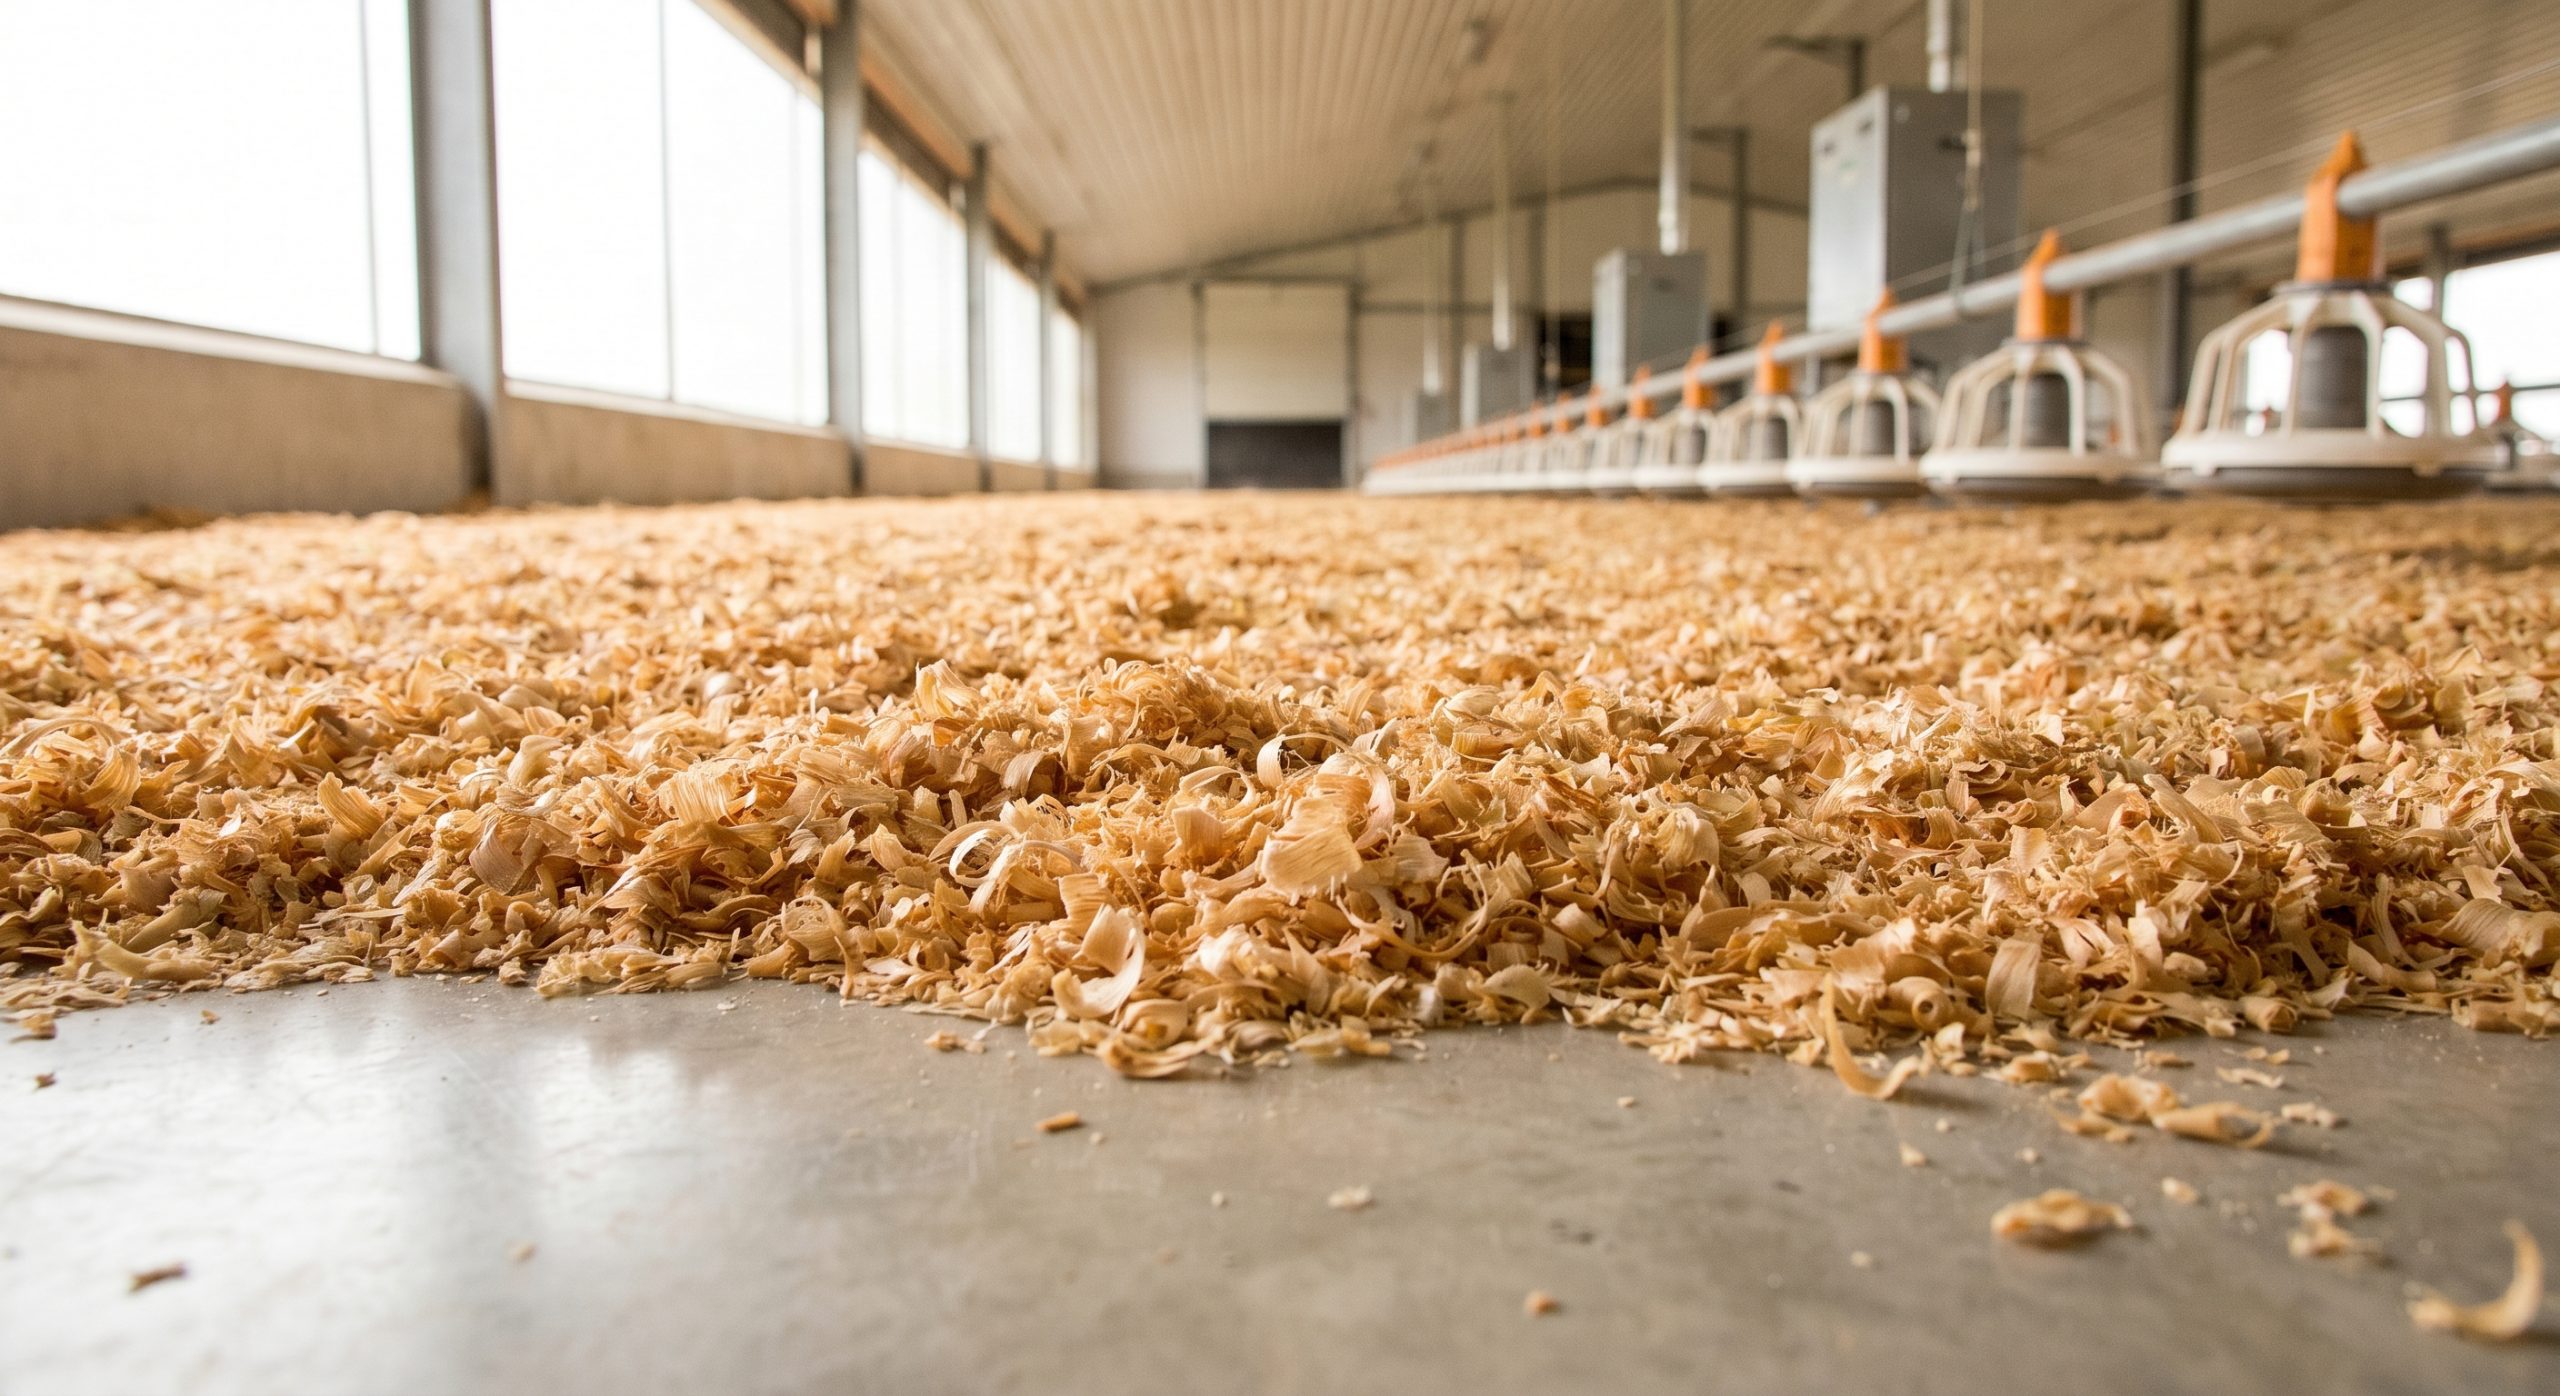
You choose the best bedding by selecting dust-free materials with excellent thermal insulation and moisture absorption properties. Laying high-quality substrate across the brooding house floor prevents contact with cold concrete and keeps chicks clean and dry. This protective floor layer acts as a critical cushion for fragile legs. It also absorbs liquid droppings to control local relative humidity.
Poor-quality bedding can lead to respiratory distress from dust, or leg damage from slick, packed surfaces. Let us review the top materials for your poultry flooring.
What materials make the best bedding?
The best bedding materials are kiln-dried pine wood shavings and chopped straw due to their high absorption rates. You must avoid using damp or moldy materials under any circumstances.
Think about it:
- Use kiln-dried pine shavings for optimal absorbency and pleasant aroma.
- Avoid cedar shavings as they contain aromatic oils toxic to chicks.
- Ensure chopped straw is completely free of mold, dampness, and dust.
Always inspect bedding batches for moisture and mold spores before spreading them across your facility. High-quality bedding keeps bacterial growth at bay.
How deep should you lay the bedding?
You should lay the bedding to a depth of at least 5 to 8 centimeters to provide solid thermal isolation. This prevents floor cold from penetrating the chick’s body.
The best part?
- Apply a minimum thickness of 5 centimeters on preheated concrete floors.
- Increase depth to 10 centimeters on uninsulated or earth floors.
- Rake the material to ensure a perfectly flat, level surface.
A level bedding surface prevents chicks from rolling onto their backs and ensures even access to feeders. It also prevents structural cold spots from developing.
Key Takeaway: High-quality bedding acts as a critical thermal buffer, preventing leg issues and footpad dermatitis while maintaining air quality.
| Bedding Material | Ideal Moisture | Laying Depth | Primary Benefit | |
|---|---|---|---|---|
| Pine Shavings | Below 12% | 5 to 8 cm | Superior absorbency, low dust | |
| Chopped Straw | Below 10% | 8 to 10 cm | Highly economical, warm |
Standardizing bedding moisture levels below twelve percent prevents ammonia release and keeps the house environment healthy.
Secure your chicks growth—optimize your brooding house now!
Email:sales@showhoo.com.cn
Phone/WhatsApp: + 86 186 7895 5927
What is the ideal brooding house temperature plan?
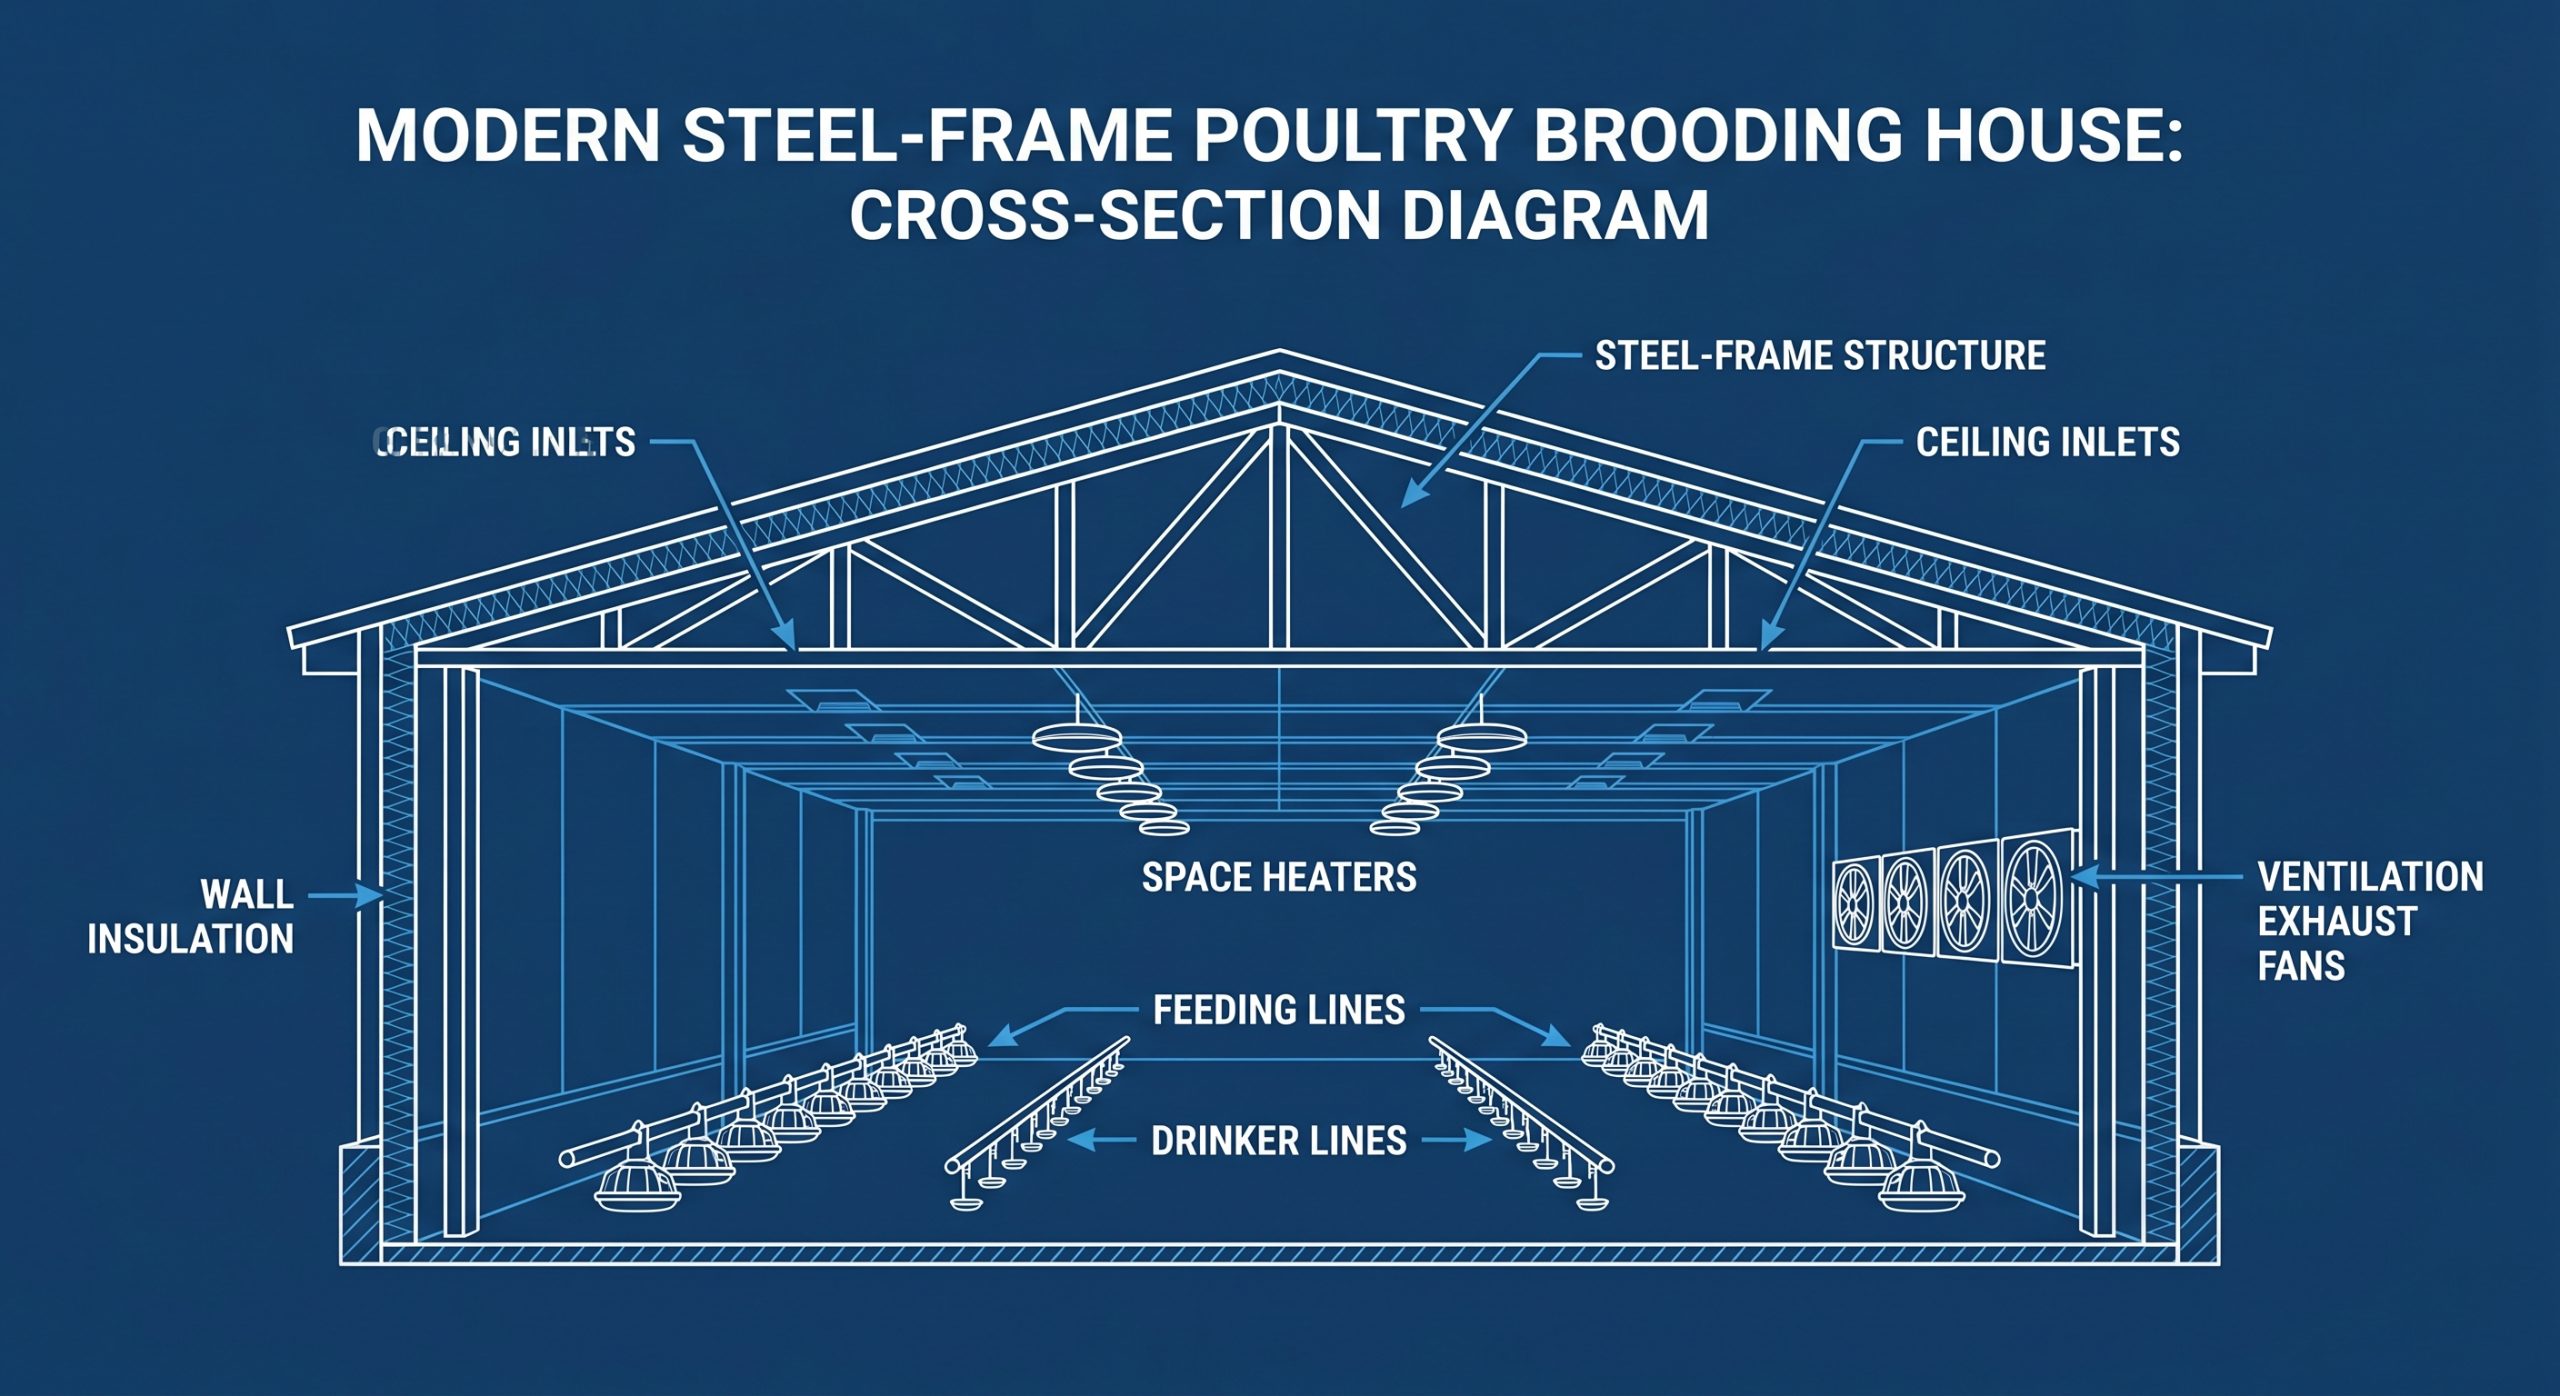
The ideal temperature plan starts high at chick placement and gradually decreases as the birds grow and develop their feathers. Maintaining this thermal curve within the brooding house prevents chilling in week one and heat stress in later weeks. Fluctuating temperatures will disrupt feed conversion and stall immune system development. A well-managed thermal curve secures long-term livability.
A stable heating strategy ensures that energy is directed towards growth rather than maintaining baseline body warmth. Let’s design a step-by-step heat management protocol.
What temperature is needed for week one?
For week one, you must keep the ambient temperature between 33 and 35 degrees Celsius at the chick’s level. This temperature must be strictly monitored around the clock.
Here’s the deal:
- Maintain 34 degrees Celsius on day one through day three.
- Lower temperature slightly to 32 degrees Celsius by day seven.
- Keep relative humidity levels steady at 60% to prevent dehydration.
This tropical microclimate supports the chicks’ natural metabolic demands during their transition. It mirrors the thermal environment of the incubator.
How do you reduce temperature step-by-step?
Reducing temperature step-by-step involves dropping the heat by approximately 2 to 3 degrees Celsius each week. This matches the gradual feathering and self-regulation of the growing birds.
Why does this matter?
- Aim for 28 to 30 degrees Celsius during the second week.
- Reduce the target to 26 degrees Celsius by week three.
- Base changes on physical bird behavior rather than just thermostat readings.
Watching how chicks occupy the space will tell you if they are comfortable or need adjustments. If they crowd, raise the temperature immediately.
Key Takeaway: A precise, gradual cooling schedule ensures smooth feather development and prevents respiratory illnesses associated with rapid thermal shifts.
| Flock Age | Target Air Temp | Relative Humidity | Bird Behavior Sign | |
|---|---|---|---|---|
| Days 1 – 3 | 33°C to 35°C | 60% to 70% | Evenly spread, active | |
| Week 2 | 28°C to 30°C | 50% to 60% | Quiet, eating and drinking |
Integrating digital climate controllers inside modern steel-frame buildings allows you to automate these complex temperature curves with ease.
How do you optimize brooding house air ventilation?
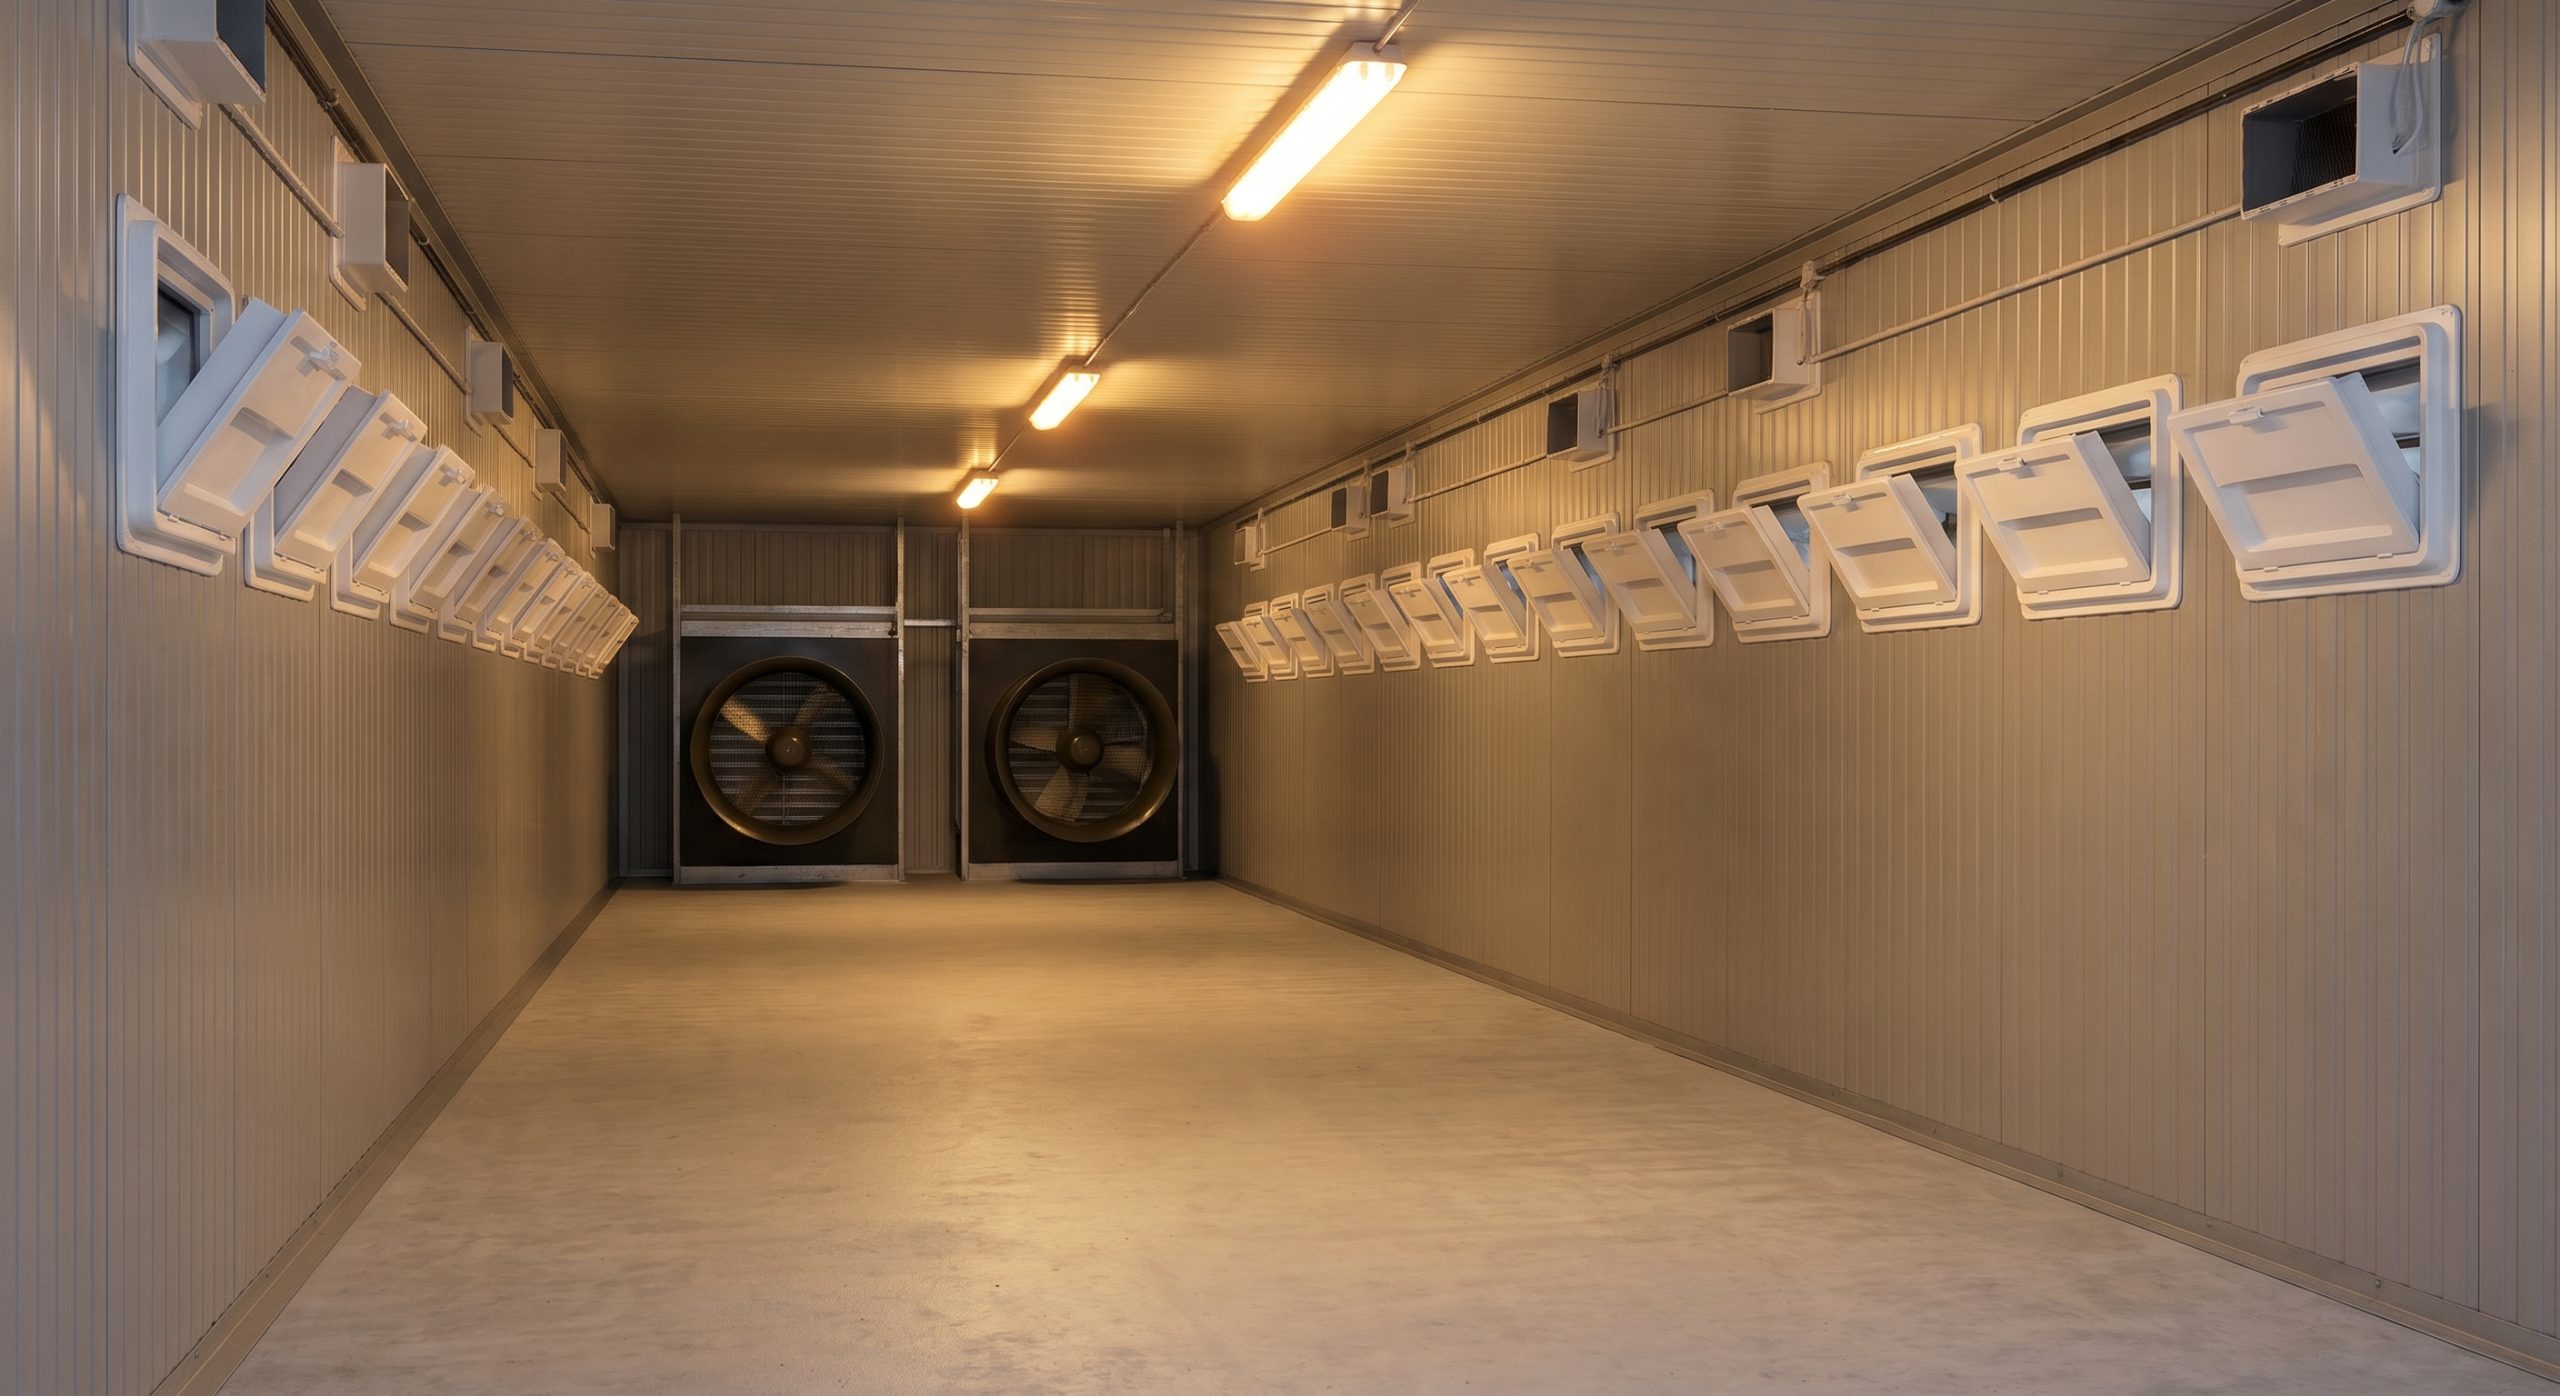
You optimize ventilation by balancing fresh air intake with heat retention to remove moisture and toxic gases. Designing the ventilation system in your brooding house ensures that oxygen is always plentiful while drafts are kept away. Proper air exchange sweeps away ammonia and carbon dioxide before they can harm young respiratory tracts. This delicate balance must be actively maintained day and night.
High carbon dioxide and ammonia levels will permanently damage young avian lungs and lead to blindness. Let’s look at setting up minimum ventilation correctly.
What is minimum ventilation setup?
Minimum ventilation is a cycle-timed system that introduces fresh air without lowering the internal room temperature. This is achieved by using automated fans and high-level wall inlets.
Let’s face it:
- Configure exhaust fans to run on a 5-minute cycle timer.
- Pull fresh air through high-level wall inlets to mix with warm air.
- Maintain an air speed below 0.15 meters per second at floor level.
This cycle introduces oxygen while ensuring cold drafts do not strike the young chicks directly. It helps lift and clear stale air without dropping floor temperatures.
How do you monitor air quality metrics?
Monitoring air quality metrics requires using specialized sensors to check gas concentrations and humidity levels daily. Keeping these parameters in check is vital for respiratory health.
Think about it:
- Keep carbon dioxide concentrations strictly below 3,000 ppm.
- Ensure ammonia levels never exceed 10 ppm at floor level.
- Maintain relative humidity between 50% and 60% for dry litter.
If ammonia becomes noticeable to your nose, you must immediately increase fan run-time. Elevated ammonia can cause corneal ulcers and severe damage to lungs.
Key Takeaway: Properly managed air exchange prevents ascites and respiratory infections, leading to lower mortality rates and better flock conversion.
| Gas / Metric | Maximum Limit | Ideal Range | Management Action | |
|---|---|---|---|---|
| Ammonia (NH3) | 10 ppm | Below 5 ppm | Increase cycle timer of fans | |
| Carbon Dioxide | 3,000 ppm | Below 2,000 ppm | Adjust air inlet openings |
Balancing static pressure with fan speeds ensures that incoming air is properly tempered before reaching floor level.
Why is brooding house lighting layout so important?
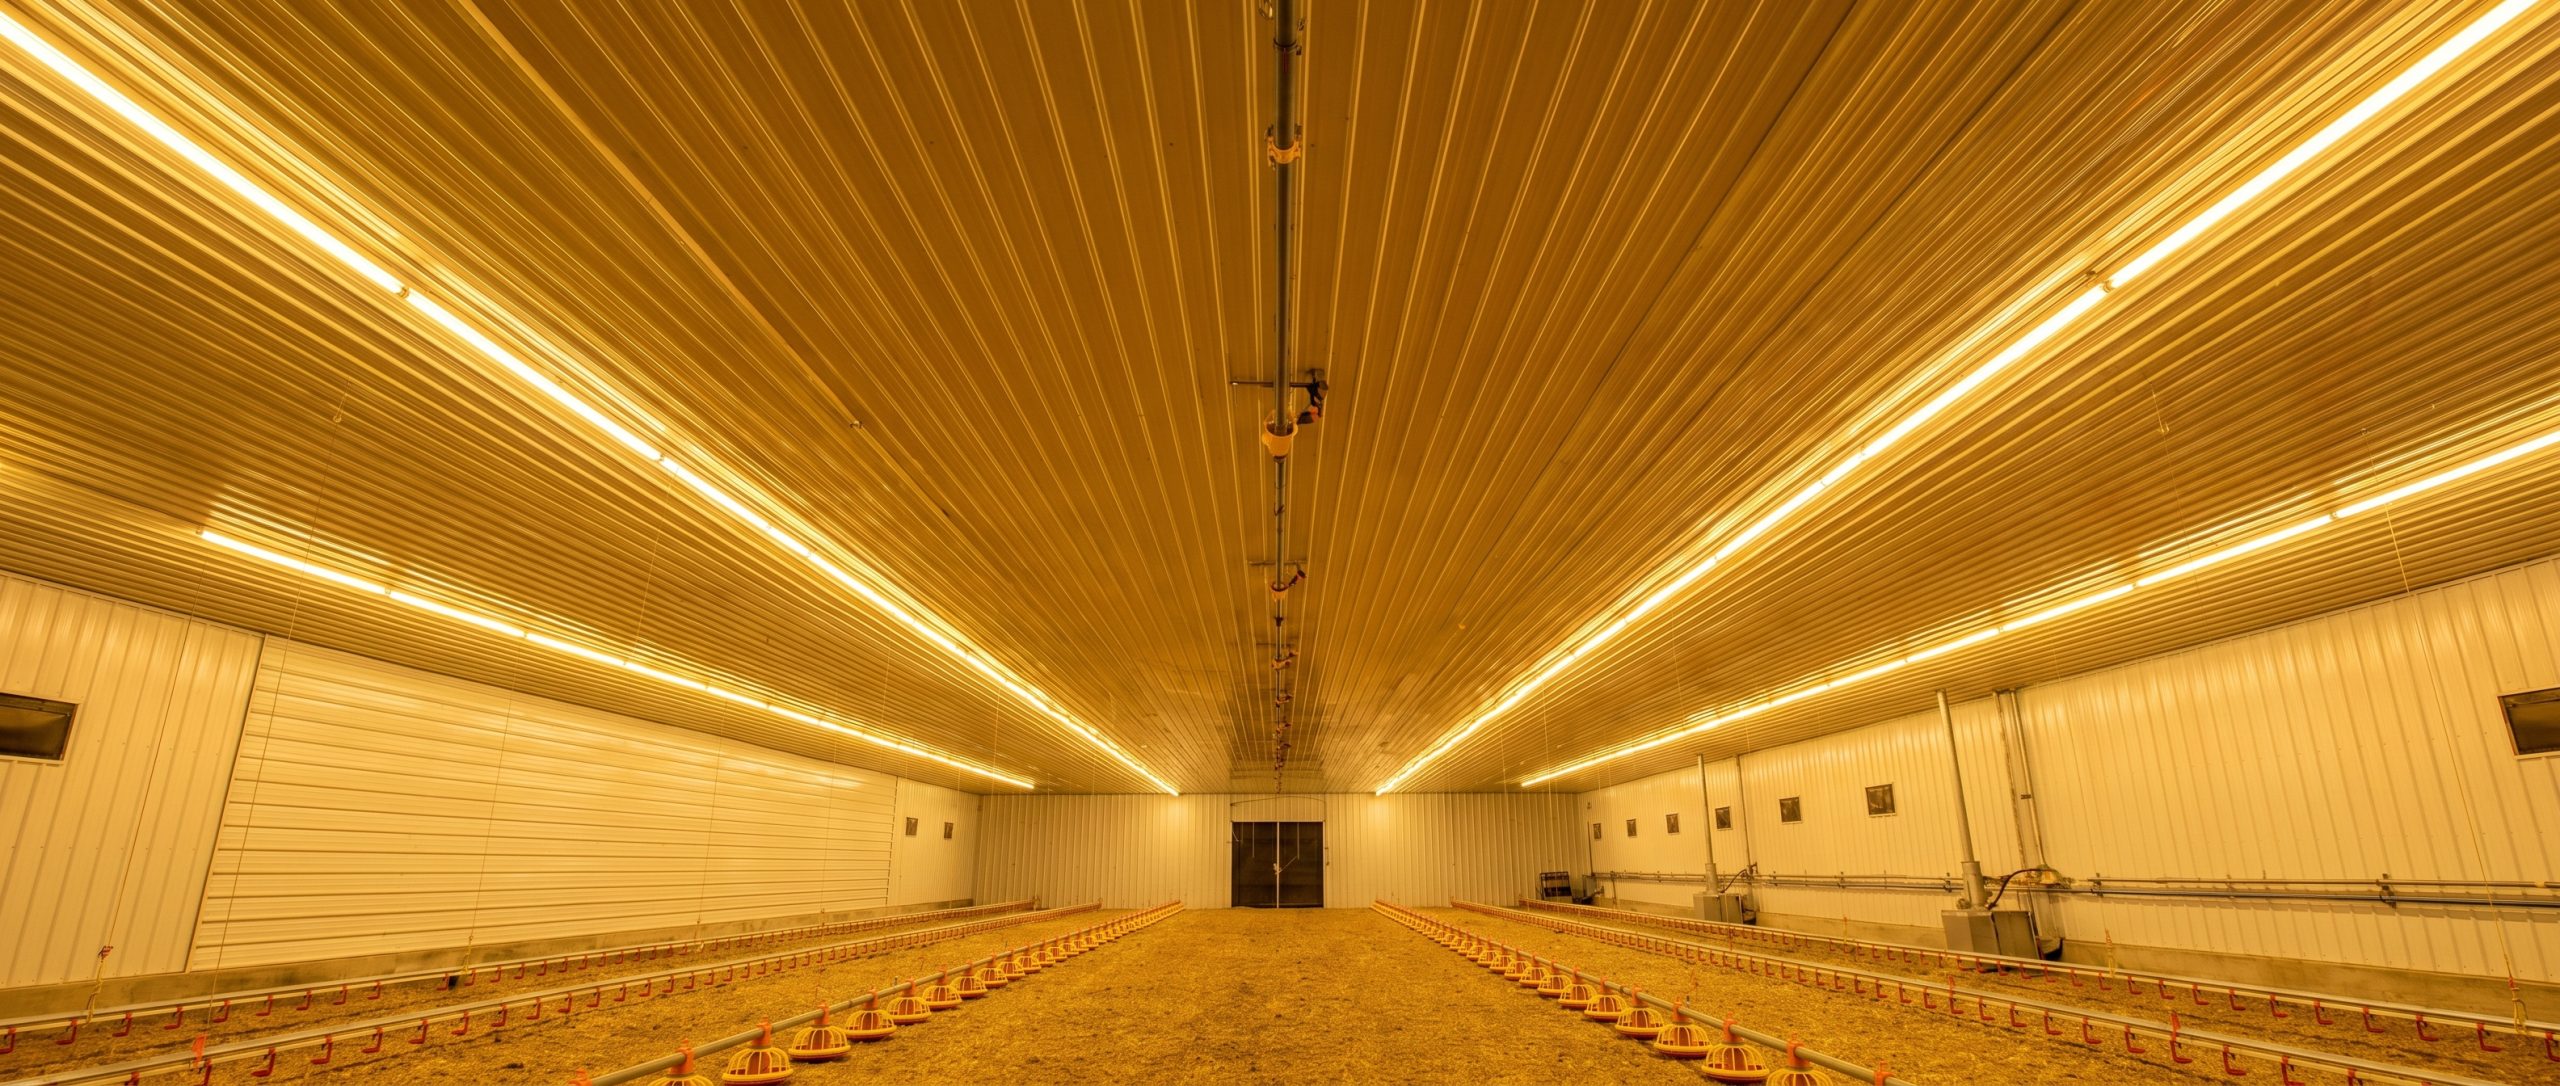
Lighting layout is important because it controls the activity, feeding behavior, and physiological development of the growing flock. Installing high-intensity, uniform illumination across the brooding house encourages day-old chicks to find feed and water immediately. Uniform light distribution prevents chicks from huddling in dark corners out of fear. It also stimulates vital hormonal pathways necessary for early growth.
Dark areas in the room will cause chicks to huddle and stop feeding, leading to uneven weights. Let us structure a highly effective lighting plan.
How should you set initial light intensity?
You should set initial light intensity very high to ensure chicks see feed and water lines easily. This helps them adapt to their environment in the critical early days.
The best part?
- Provide a minimum of 40 to 60 lux during the first three days.
- Keep lights on for 23 hours a day to maximize feed consumption.
- Allow 1 hour of darkness so chicks adapt to sudden power changes.
This high brightness stimulates early activity and helps chicks map their warm environment quickly. It ensures no chick is left starving in a dark corner.
How do you implement lighting programs?
Implementing lighting programs means reducing both the light duration and intensity as the chicks grow older. This gradual step-down program supports healthy natural rhythms.
Here’s the deal:
- Reduce intensity to 10-15 lux by day ten of the grow-out.
- Introduce a structured darkness period of 4 to 6 hours daily.
- Use high-quality dimmable LED lights to prevent stressful flickering.
Structured rest periods support skeletal development and prevent sudden cardiovascular deaths. It also reduces feed conversion ratios by allowing the birds to rest.
Key Takeaway: Uniform lighting prevents crowding in bright spots, which minimizes stress and helps maintain exceptional flock consistency.
| Bird Age | Light Duration | Light Intensity | Objective | |
|---|---|---|---|---|
| Days 1 – 3 | 23 Hours | 40 to 60 Lux | High activity, feed discovery | |
| Days 4 – 7 | 20 Hours | 20 to 30 Lux | Initial rest cycle introduction |
Placing dimmable LED lines at uniform intervals prevents shadowing along critical feed and water access points.
How do you build a secure brooding house facility?
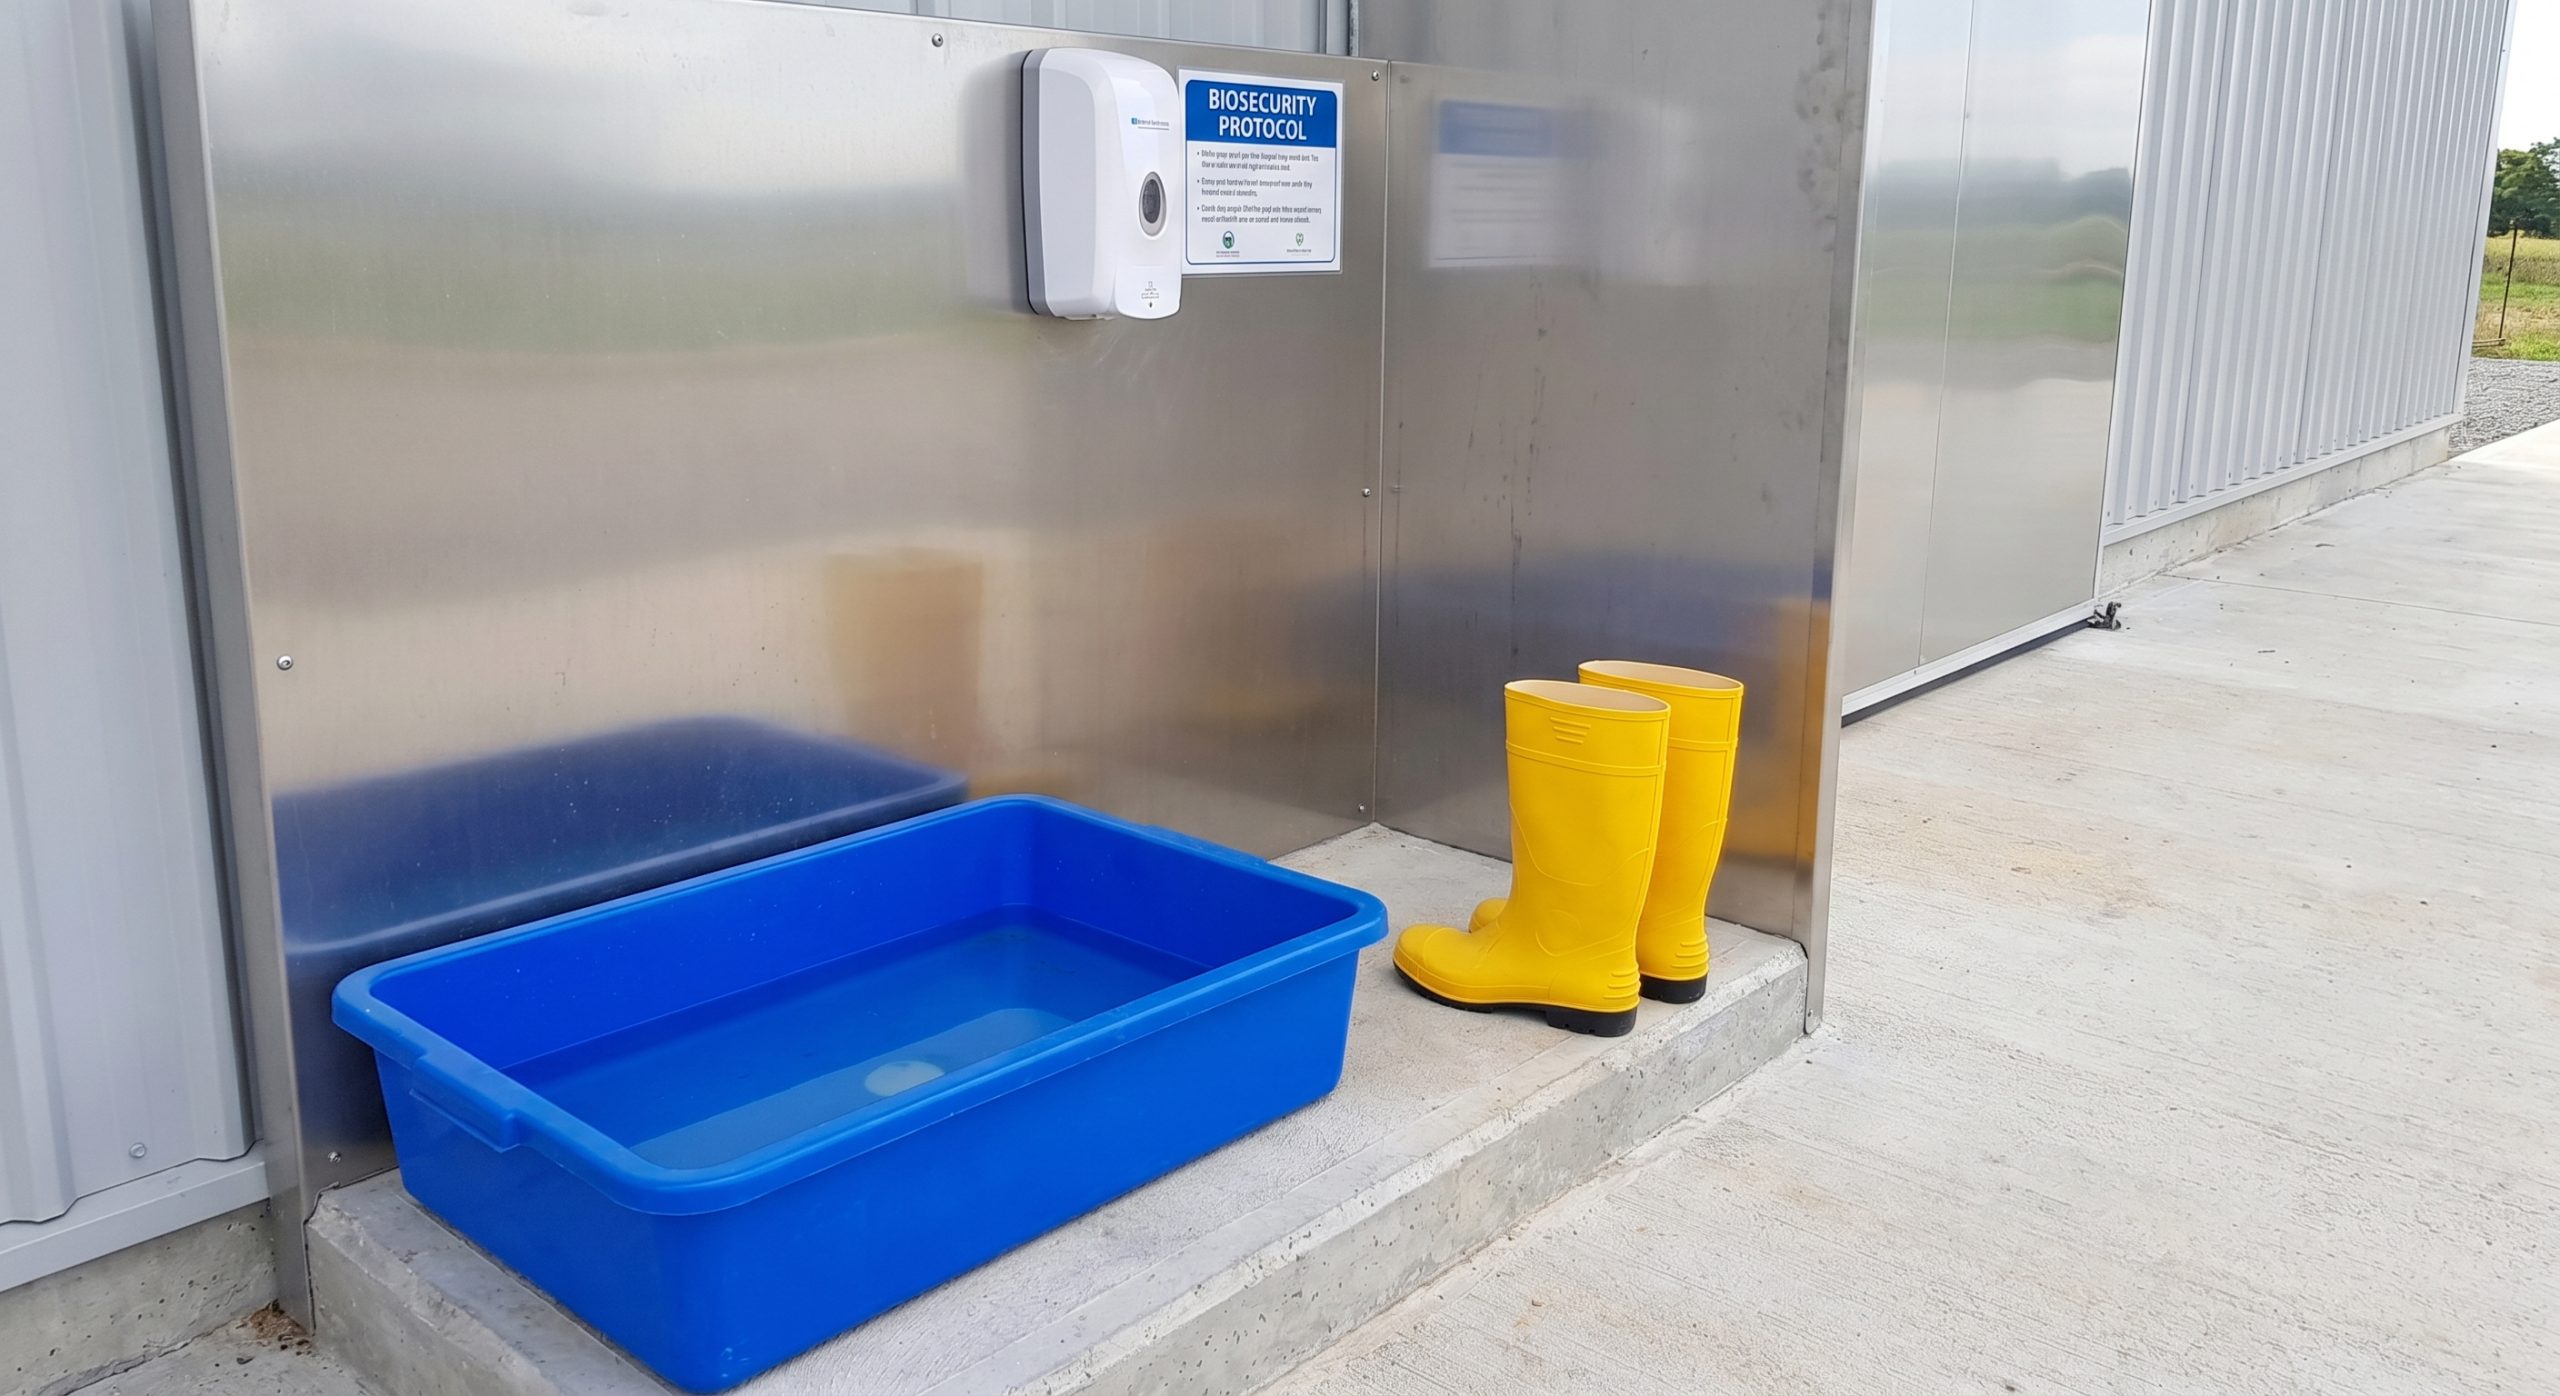
You build a secure facility by establishing physical biosecurity barriers and sealing all entry points against external vectors. Securing your brooding house prevents wild birds, rodents, and human visitors from introducing devastating avian pathogens. Young chicks have no immune defenses against external viruses and bacteria. A tightly managed entrance protocol protects your entire capital investment.
A breach in security during the vulnerable early stages can lead to total crop failure. Let’s establish a strict biosecurity protocol.
How do you control visitor access?
Controlling visitor access involves setting up strict entry protocols and restriction policies at the farm gate. This prevents human vectors from bringing pathogens into the facility.
Let’s face it:
- Permit entry only to essential farm workers and veterinarians.
- Enforce a mandatory shower-in, shower-out protocol.
- Require all personnel to wear dedicated boots and protective overalls.
Restricting movement prevents the mechanical transfer of pathogens from outside environments to your vulnerable birds. It acts as an impenetrable shield for your flock.
How do you secure structural boundaries?
Securing structural boundaries requires sealing all air vents, walls, and floor cracks with durable materials. This prevents rodents and wild birds from entering the facility.
Why does this matter?
- Install wire mesh screens over all ventilation wall inlets.
- Seal cracks in concrete floors to eliminate rodent nesting sites.
- Establish a 3-meter clean concrete perimeter around the building.
Eliminating vegetation and debris around the facility removes hiding spots for pests. It keeps your brooding space secure from outside biological threats.
Key Takeaway: Building a secure biosecurity boundary shields your delicate flock from devastating economic losses caused by transmissible diseases.
| Barrier Zone | Action Required | Key Equipment | Primary Benefit | |
|---|---|---|---|---|
| Entry Station | Boot disinfection, hand wash | Footbaths, sanitizer dispensers | Kills pathogens at entry | |
| Outer Perimeter | Rodent baiting, vegetation clearing | Bait boxes, concrete apron | Keeps pests away from structure |
Maintaining strict footbath sanitation outside every entry point represents the simplest yet most effective line of biosecurity defense.
Conclusion
Preparing your facility properly is the foundation of a highly profitable grow-out cycle. By executing a meticulous routine of deep cleaning, sanitizing, preheating, and strict climate monitoring, you guarantee that your day-old chicks start in the safest environment possible. We understand that managing these variables requires advanced structural support. That is why we are dedicated to building sustainable and high-performance steel structures that elevate poultry farming efficiency worldwide. Ready to build a high-efficiency facility tailored to your farm? Make sure to contact us today to discuss custom engineering solutions designed to secure your long-term agricultural success.
Secure your chicks growth—optimize your brooding house now!
Email:sales@showhoo.com.cn
Phone/WhatsApp: + 86 186 7895 5927
Frequently Asked Questions
Can I reuse old bedding from a previous flock?
No, you should never reuse old bedding. Used litter contains high concentrations of pathogenic bacteria, mold spores, and parasites from the previous crop that will easily infect fragile day-old chicks. Always strip the floor completely and apply fresh, sterile substrate for every new batch.
What’s the best way to tell if the brooding temperature is too cold?
Yes, you can easily tell by watching the physical distribution of your flock. If the chicks are huddling tightly together under the heaters or in corners, the temperature is too low. Healthy, comfortable chicks will disperse evenly across the floor and be highly active.
Can I use domestic cleaning detergents for washing the facility?
No, it is not recommended to use domestic detergents. Commercial poultry houses require heavy-duty industrial foam detergents designed specifically to break down stubborn organic biofilms and fats. Domestic cleaning soaps lack the chemical strength needed to prepare surfaces for medical-grade disinfectants.
How do I know if my water pressure is too high for chicks?
Yes, you will notice excessive wetness in the litter beneath the drinking lines. High water pressure makes it difficult for small chicks to activate the nipples, causing them to play with the pins or causing water to spray out and soak the bedding. Reduce the pressure until a small droplet sits comfortably at the end of each nipple.
Can I skip preheating if my farm is in a tropical region?
No, you must still preheat the house. Even in hot climates, concrete subfloors can remain cool and damp, which will quickly sap body heat from nesting chicks. Preheating for at least 24 hours ensures the ground is dry, warm, and ready to prevent thermal shock.